


A guide to Camera Raw / Lightroom editing
for Beginner Photographers and Photo Enthusiasts.
You’re scrolling through your Instagram feed, leaving hearts as you go,
but every now and then you stop to admire that special photo, the one
that made you stop the almost robotic thumb movement, the one that
caught your attention among the never-ending feed of photography we daily
consume.
What is the secret ingredient to these photos, that seem to possess the
power to freeze time around you? You know, the kind of photos you can
lose yourself in, that make your heart skip a beat, the kind that
transport you to some other place.
You need to execute couple of things the right way to make that happen, and those ingredients are:
1. The Subject
2. The Story
3. The Composition
4. The Color
Let’s say that your photo contains an interesting subject or a place you’ve photographed, and you’ve already did your best to compose it in your frame, ticking 2 out of 4 on our list, yet you feel that something is missing, it still lacks that special spark.
This is where we will use color and some basic edit to spark that flame, help tell your story better, and make your photo stand out!
In order to do this let’s jump into our favorite photo editing applications!
My suggestion is using Lightroom or Camera Raw,
and I will base this tutorial on it, but you can use the one available
to you, as most of the functions we’re going to cover here, are shared
between all the photo editing apps today.
Note that Camera Raw and
Lightroom offer you the same exact functions, and the recent update made
the two look alike!
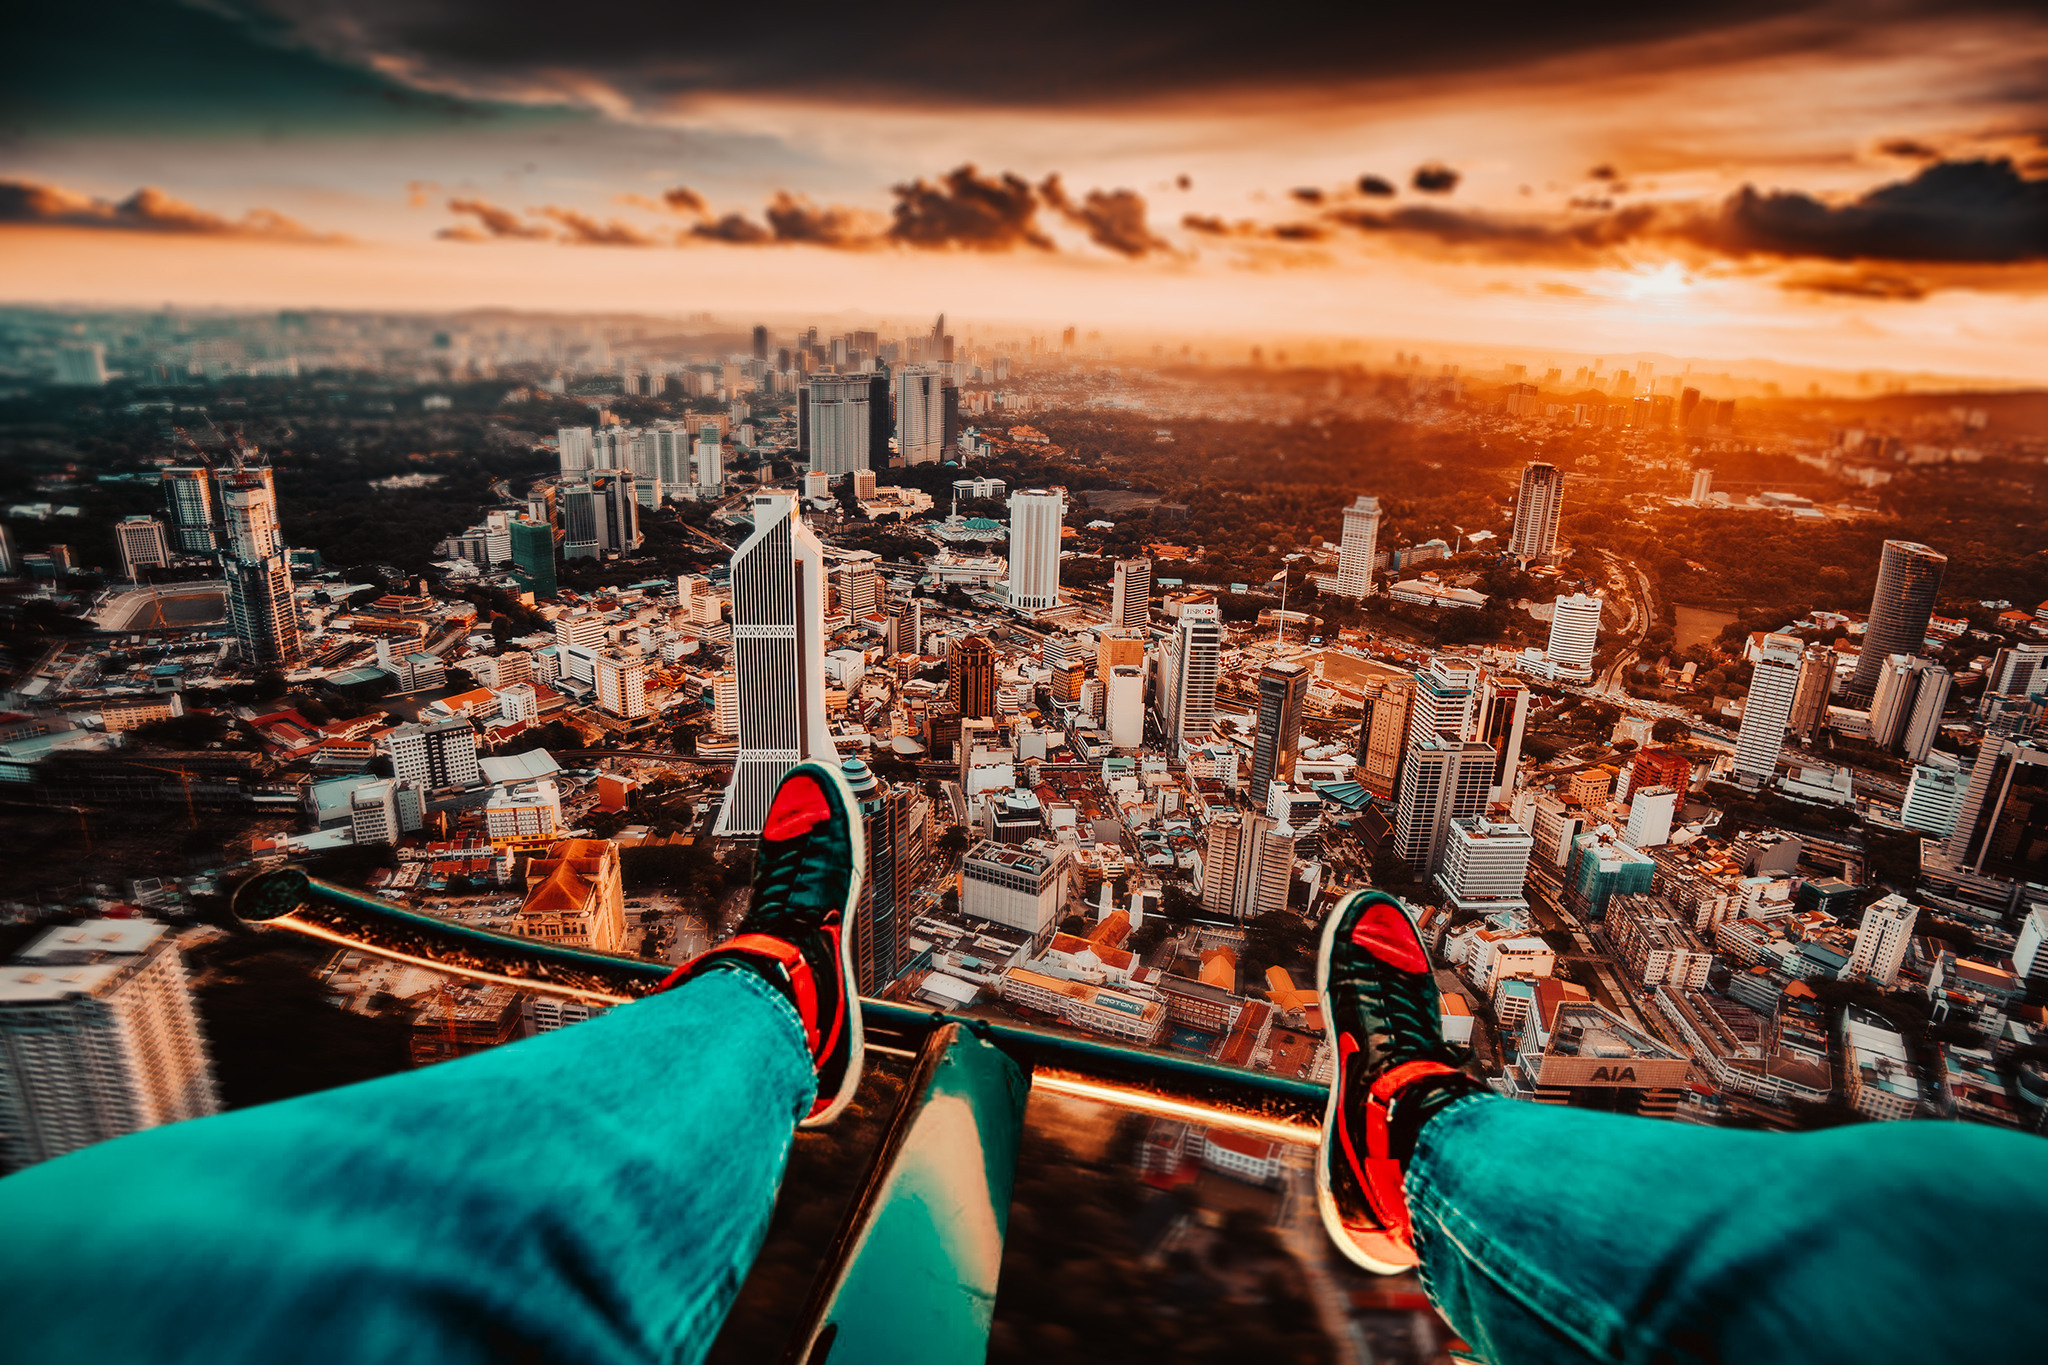
I will be using two photos in this tutorial to demonstrate the editing phases we will be going through.
The principles of photo editing are always the same, however, a portrait
shot might need some additional skin edit further.
However, If you
choose to keep your portraits natural, this tutorial will be more than
enough!

Let’s Begin!
For the purpose of this tutorial I will be using Adobe Photoshop Camera Raw.
Once you open or drop an image into your Photoshop, you will be greeted with a screen that looks like this:
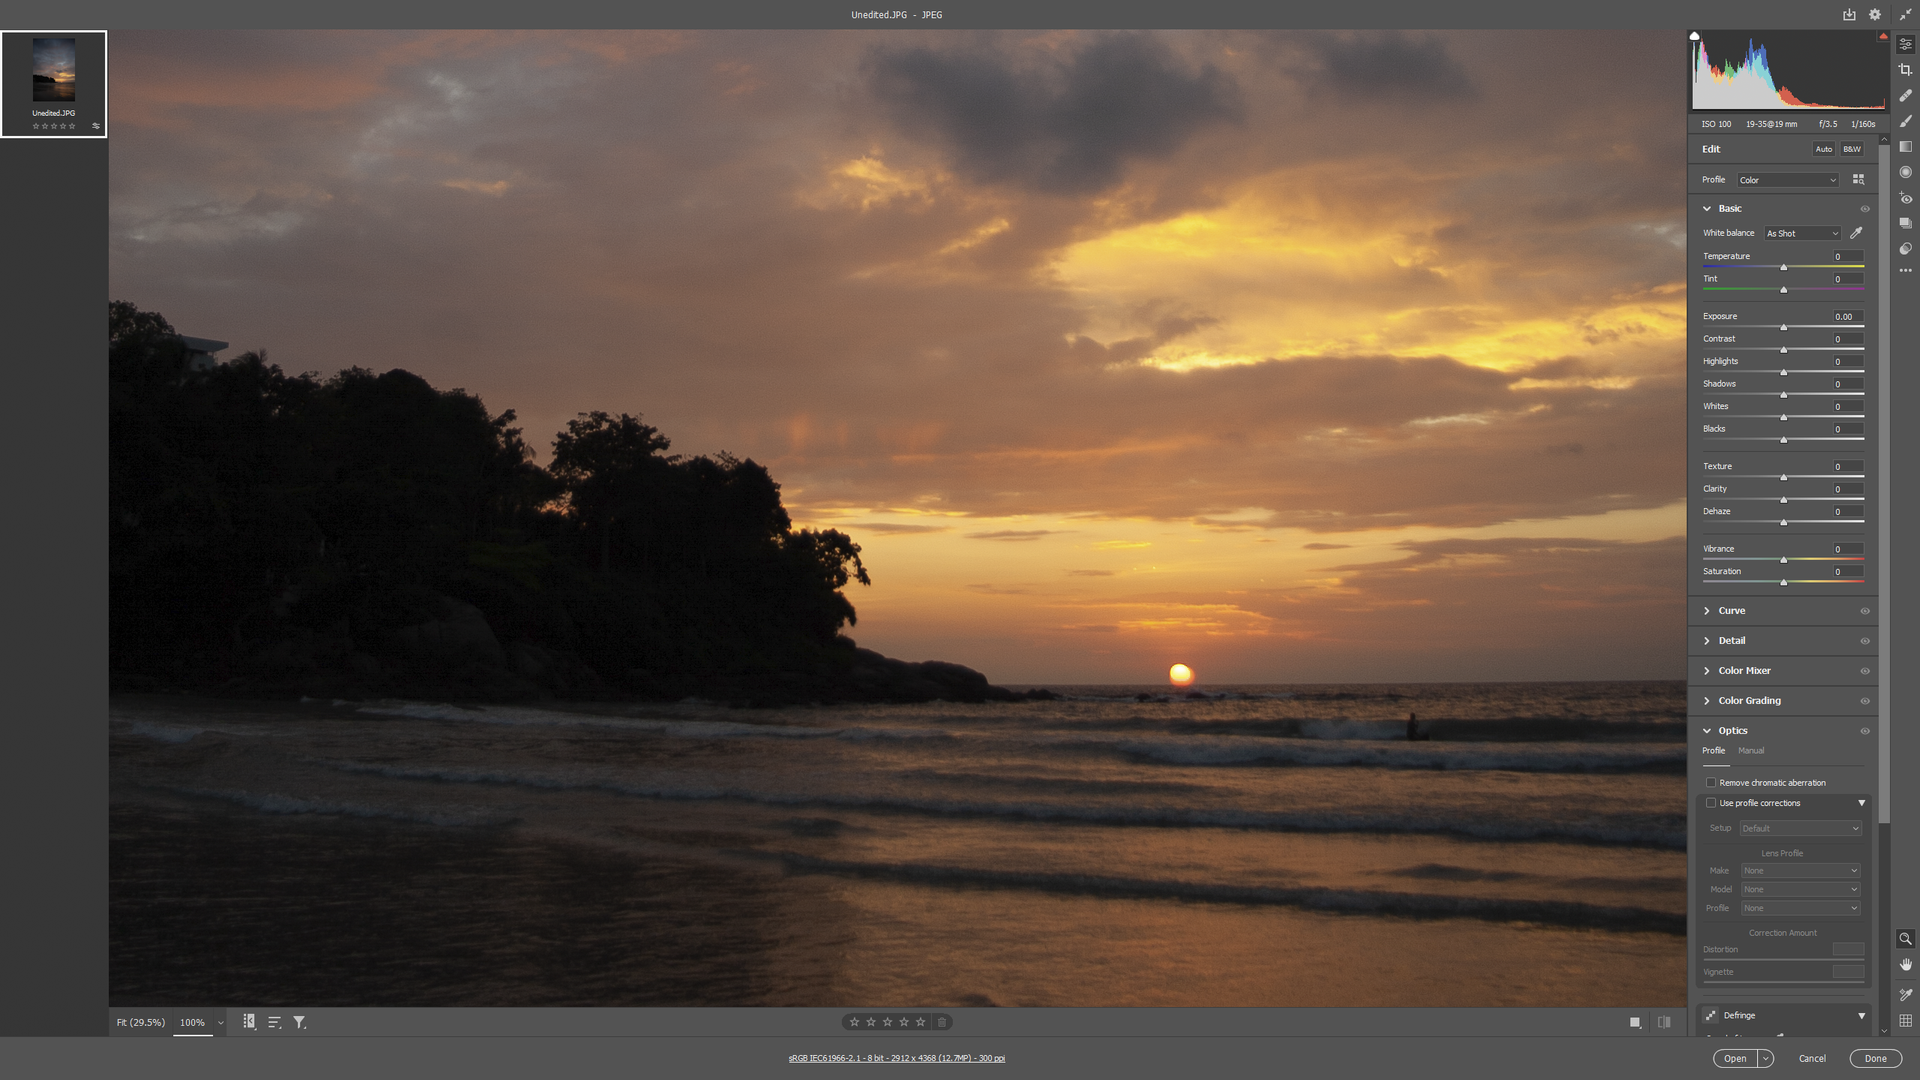
After you import your photo, and if you’ve decided to edit for Web display,
make sure to set your Working Color Space to sRGB.
You can find this at the bottom of the Camera Raw panel displayed on the image above
You’ll probably have
to do this only once, the first time you run Camera Raw/Lightroom

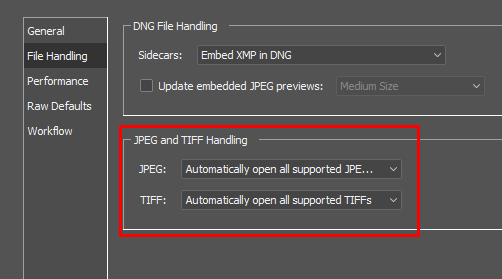
You can force Camera Raw to open up automatically every time you drop or open an image using Photoshop, just check the cog icon in the upper right corner!
click the images to enlarge
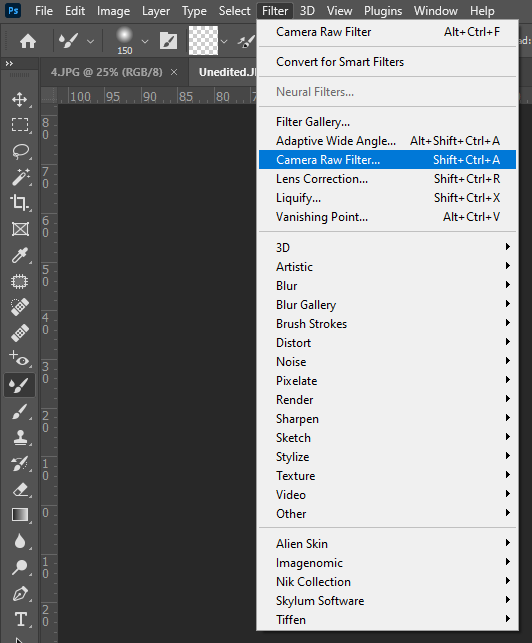
Also, remember that you can use Camera Raw just like any filter in Photoshop, multiple times throughout your edit.
You can access it using the Filter Menu, or using a ''Shift+Ctrl+A'' key combination. Shortcuts are always useful so try to remember this one! :)
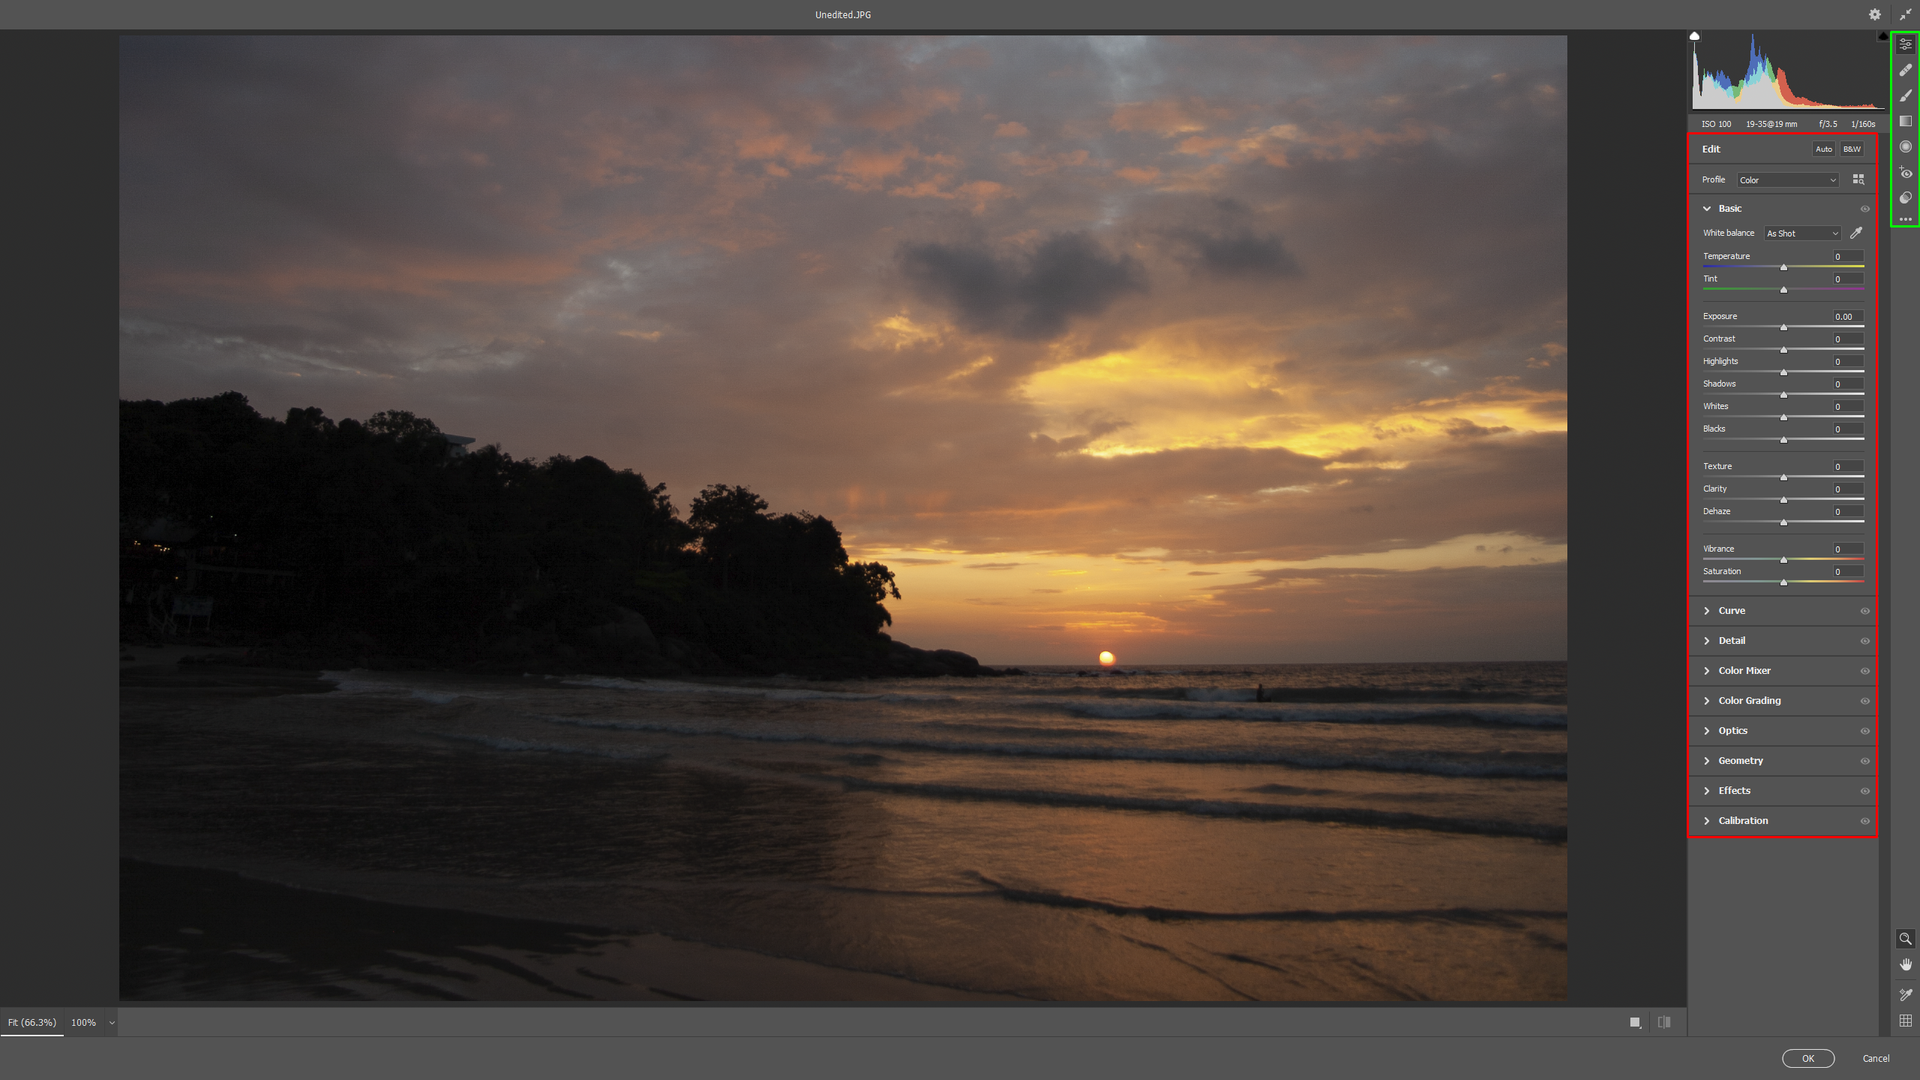
Now that your color space is set correctly, let’s get familiar with the Panels.
There
is no set rule when it comes to which group of Panels and its sliders
you will be editing first, and you can always return to the group you’ve
already finished with to change things a notch or revise your edit
Both Photoshop’s Camera RAW and Lightroom differ two types of editing:
- Global Editing (Sliders affect the whole area of the photo you’re looking at) — area marked red
- Local Editing (Sliders affect only the area marked by the brush or gradient tool) — area marked green
Now that we got familiar with where our Photo editing Tools and sliders are, let’s edit some photos!
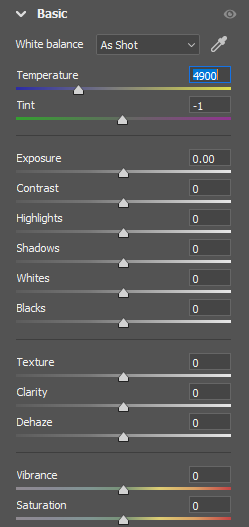
The Basic Panel
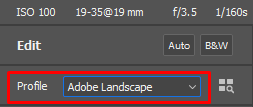
We’re gonna start by choosing the right Profile. In order to make
it simple for you, you can understand profiles as a ‘light version of a preset’, or
as the algorithm Adobe uses to interpret colors coming from your file.
The differences between the included Adobe’s own profiles aren’t as
big as the ones you may purchase or find online that can be used as
presets to absolutely transform the colors.
You can play and experiment using the profiles. Sometimes a portrait profile could end up being a better choice than a landscape one, even if the photo you’re editing is a landscape shot.
Use your eyes, and remember — there’s no right setting is this case other than the one you like!
Note that Adobe’s own
‘’Adobe Color’’ is often ideal, however, you may want to check others
out in case they fit your photos better.
For the photo we will be editing I opted for the Adobe Landscape
Now we’re jumping to our main group of sliders, this is where you’ll be spending most of your time editing! It’s the Basic panel that includes everything from Exposure Settings, to Color Temperature.
I highly recommend that you take time experimenting and understanding
how sliders behave and how they affect your photos.
Some of them are simple and intuitive, like Exposure, Contrast, etc, while some are quite specialized, like the Clarity, Dehaze, etc. Play around and get familiar with them!
The Base position of all sliders in Photoshop is 0, shown on the image.
Manipulating these sliders, you will start to notice the look of your photo changes. We can start by changing the White Balance, warming or cooling down the colors of the photo you’re working on.
There is no recipe saying what are the right settings. The right is what looks good to you!

Already looking better!
After we’re done with White Balance, let’s set the Exposure, Contrast, Shadows etc.
Completing this, you can try playing with Dehaze and Clarity, giving your photo a little texture and color boost.
Be careful with the Texture Slider, we don’t want that oversharpened digital look!
Now that we’ve shifted our sliders in the desired positions you can
already see a drastic difference compared to the unaltered photo.
However there’s still more hidden potential behind our shot, so let’s explore more of the panels awaiting below!
Our Next Station — The Curves Panel!
Curves are a very mighty tool, allowing you to edit everything from Light to Color in a couple of clicks using the curve. What this tool does, is that it divides the color and light information into segments allowing you very precise manipulations of these aspects.
The most important is to not be afraid of the intimidating look of this panel.
I understand it might take you
a while to master the graphic representation of your photo.
Get
familiar with this panel, toy around with the settings and look for the changes in your photo!
The Curves panel has three distinctive groups. The first one is the most simple one and it will help you understand how Curves work. The sliders below might remind you of the Basic Panel we’ve been using in our previous steps.
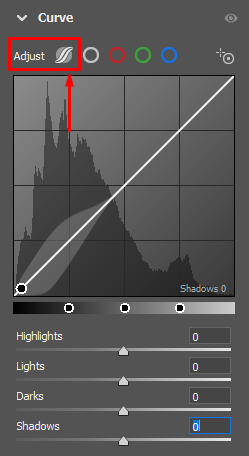
Changing the sliders or pulling at the diagonal line, you will notice how it affects your photo. Basically Curves Panel divides your photo into areas of Highlights, Lights, Darks, and Shadows, allowing you to get very precise with each and every segment.
The next option is the General Curve, which allows us even more freedom,
in terms of manipulating the light of our shot.
This is the most challenging curve type to master, but at the same time — the one that gives you the most in terms of editing your photo.
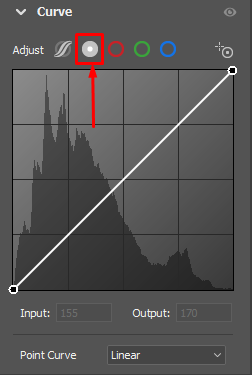
It is working on the same
principle as the variant of the curves we’ve covered before, but without the limitation of
the 4 groups of lighting we had in our previous steps.
Think of it as the ''unlocked'' cousin of the method we’ve been trying out before
(the one on the left)
The last option the curves panel offers us are the Color Channel Curves
(Red, Green, and Blue) that allow us to
add or remove any tone or color from a certain dark or light area of
our shot.
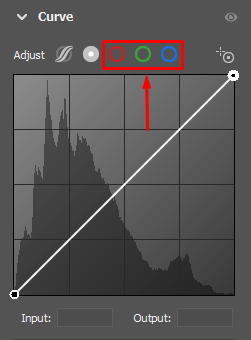
Next to them there is circle icon with a little cross. Give it a try!
What this tool allows you is to manipulate the curve panel just by clicking and dragging on your photo. It works in all the curve modes. It’s a quick and interesting way of using the curves, that avoids the sometimes intimidating graphical representation of lights and darks using the histogram and the diagonal curve.
Now that we’re done with curves, it’s time for a panel that will probably look familiar to most of you.
It’s the........*drum roll*
Hue Saturation Luminance Slider Panel, commonly known as HSL
The three groups of the HSL Panel (the area I marked red) allow you to edit the colors of your photo in a quick and intuitive way thanks to the color coded sliders.
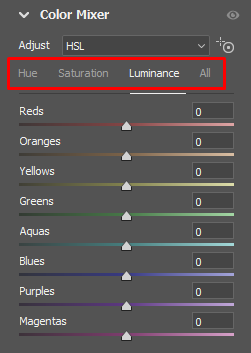
The Hue group allows you to color shift certain colors of your image.
The Saturation group allows you to add or remove color from a channel you’re manipulating.
The Luminance group adds or removes light within the certain color
I’ve shifted the colors, boosting the colors already present on our shot, allowing certain tones to pop out or to blend nicely with the ones next to them.

This is a very simple, yet powerful tool.
You can use it to enhance or do a quick skintone fix, darken or boost the sky, enhance the color of the foliage, flowers…
The last — Luminance group behaves in a similar way to how the curve panel we’ve covered before works.
Even though it seems easy, take your time and familiarize yourself with the plethora of options this little tool can provide once creatively used.
The difference after playing with these sliders is once again obvious!
The next panel we will be covering deals with the colors as well. Once you’ve mastered the HSL Panel — it’s time to hop to the next one awaiting us below!


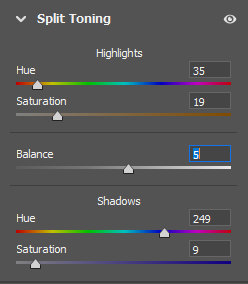
Split Toning

Split toning allows us to tone the shadows and highlights of our shot,
and to balance these two across our photo.
You can warm up the highlights,
cool down the shadows, getting the tones nearer to the complementary
color palette.
You can use the Split Toning panel to fix the issues with your image or to creatively edit, adding atmosphere, and setting the mood.
Once again, no rules with this one.
The Highlights group:
Using the Hue slider choose the color you will be infusing your highlights with. The Saturation slider is used to set the intensity of the color you’ve chose.
The Shadows group:
Works exactly the same, the only difference being the fact you will be adding tones into the shadows of your image.
The Balance slider is used to balance out the tones present in your highlights or shadows, allowing you to choose the dominating tones or blend them according to your own liking.
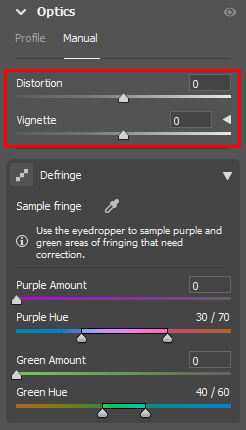
The Optics Panel
This is the panel that allows you to remove the vignette caused by the lenses we use on
our cameras,
and to even out the distortion often
caused by the same wide angle lenses (strange body proportions, curved lines of the horizon and the tall buildings…)
It works in two modes — Automatic (under the Profile tab) and Manual. The Automatic mode recognizes the lens and camera body you’re using, comparing it to the correction profiles found in the Photoshop’s own archive and adjusting for the distortion and vignetting with no more than a click.
You can also use the Optics panel to further enhance the vignette, using it as an effect (also present in the Effect panel)
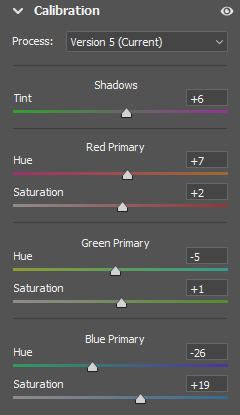
Next stop — Camera Calibration, one of my favorite panels.
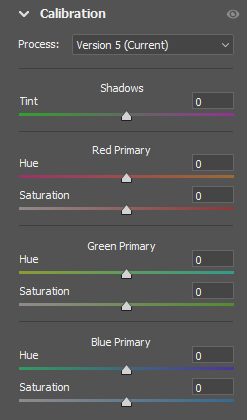
Camera Calibration, like the Profiles we’ve mentioned above, deals
with the interpretation of colors and their shades by the Camera Raw/Lightroom.
It’s usually used as a technical tool to change the representation of certain
hues, and especially skintones.
However you can go crazy with the sliders, adding
color, and changing tones drastically, using it as a color effect,
rather than a simple correction tool.
A slight change in sliders goes a long way, so often a small nudge will be more than enough.
For the photo we are editing, I did exactly that, went crazy and played with its many sliders, further enhancing the tones present in our image.
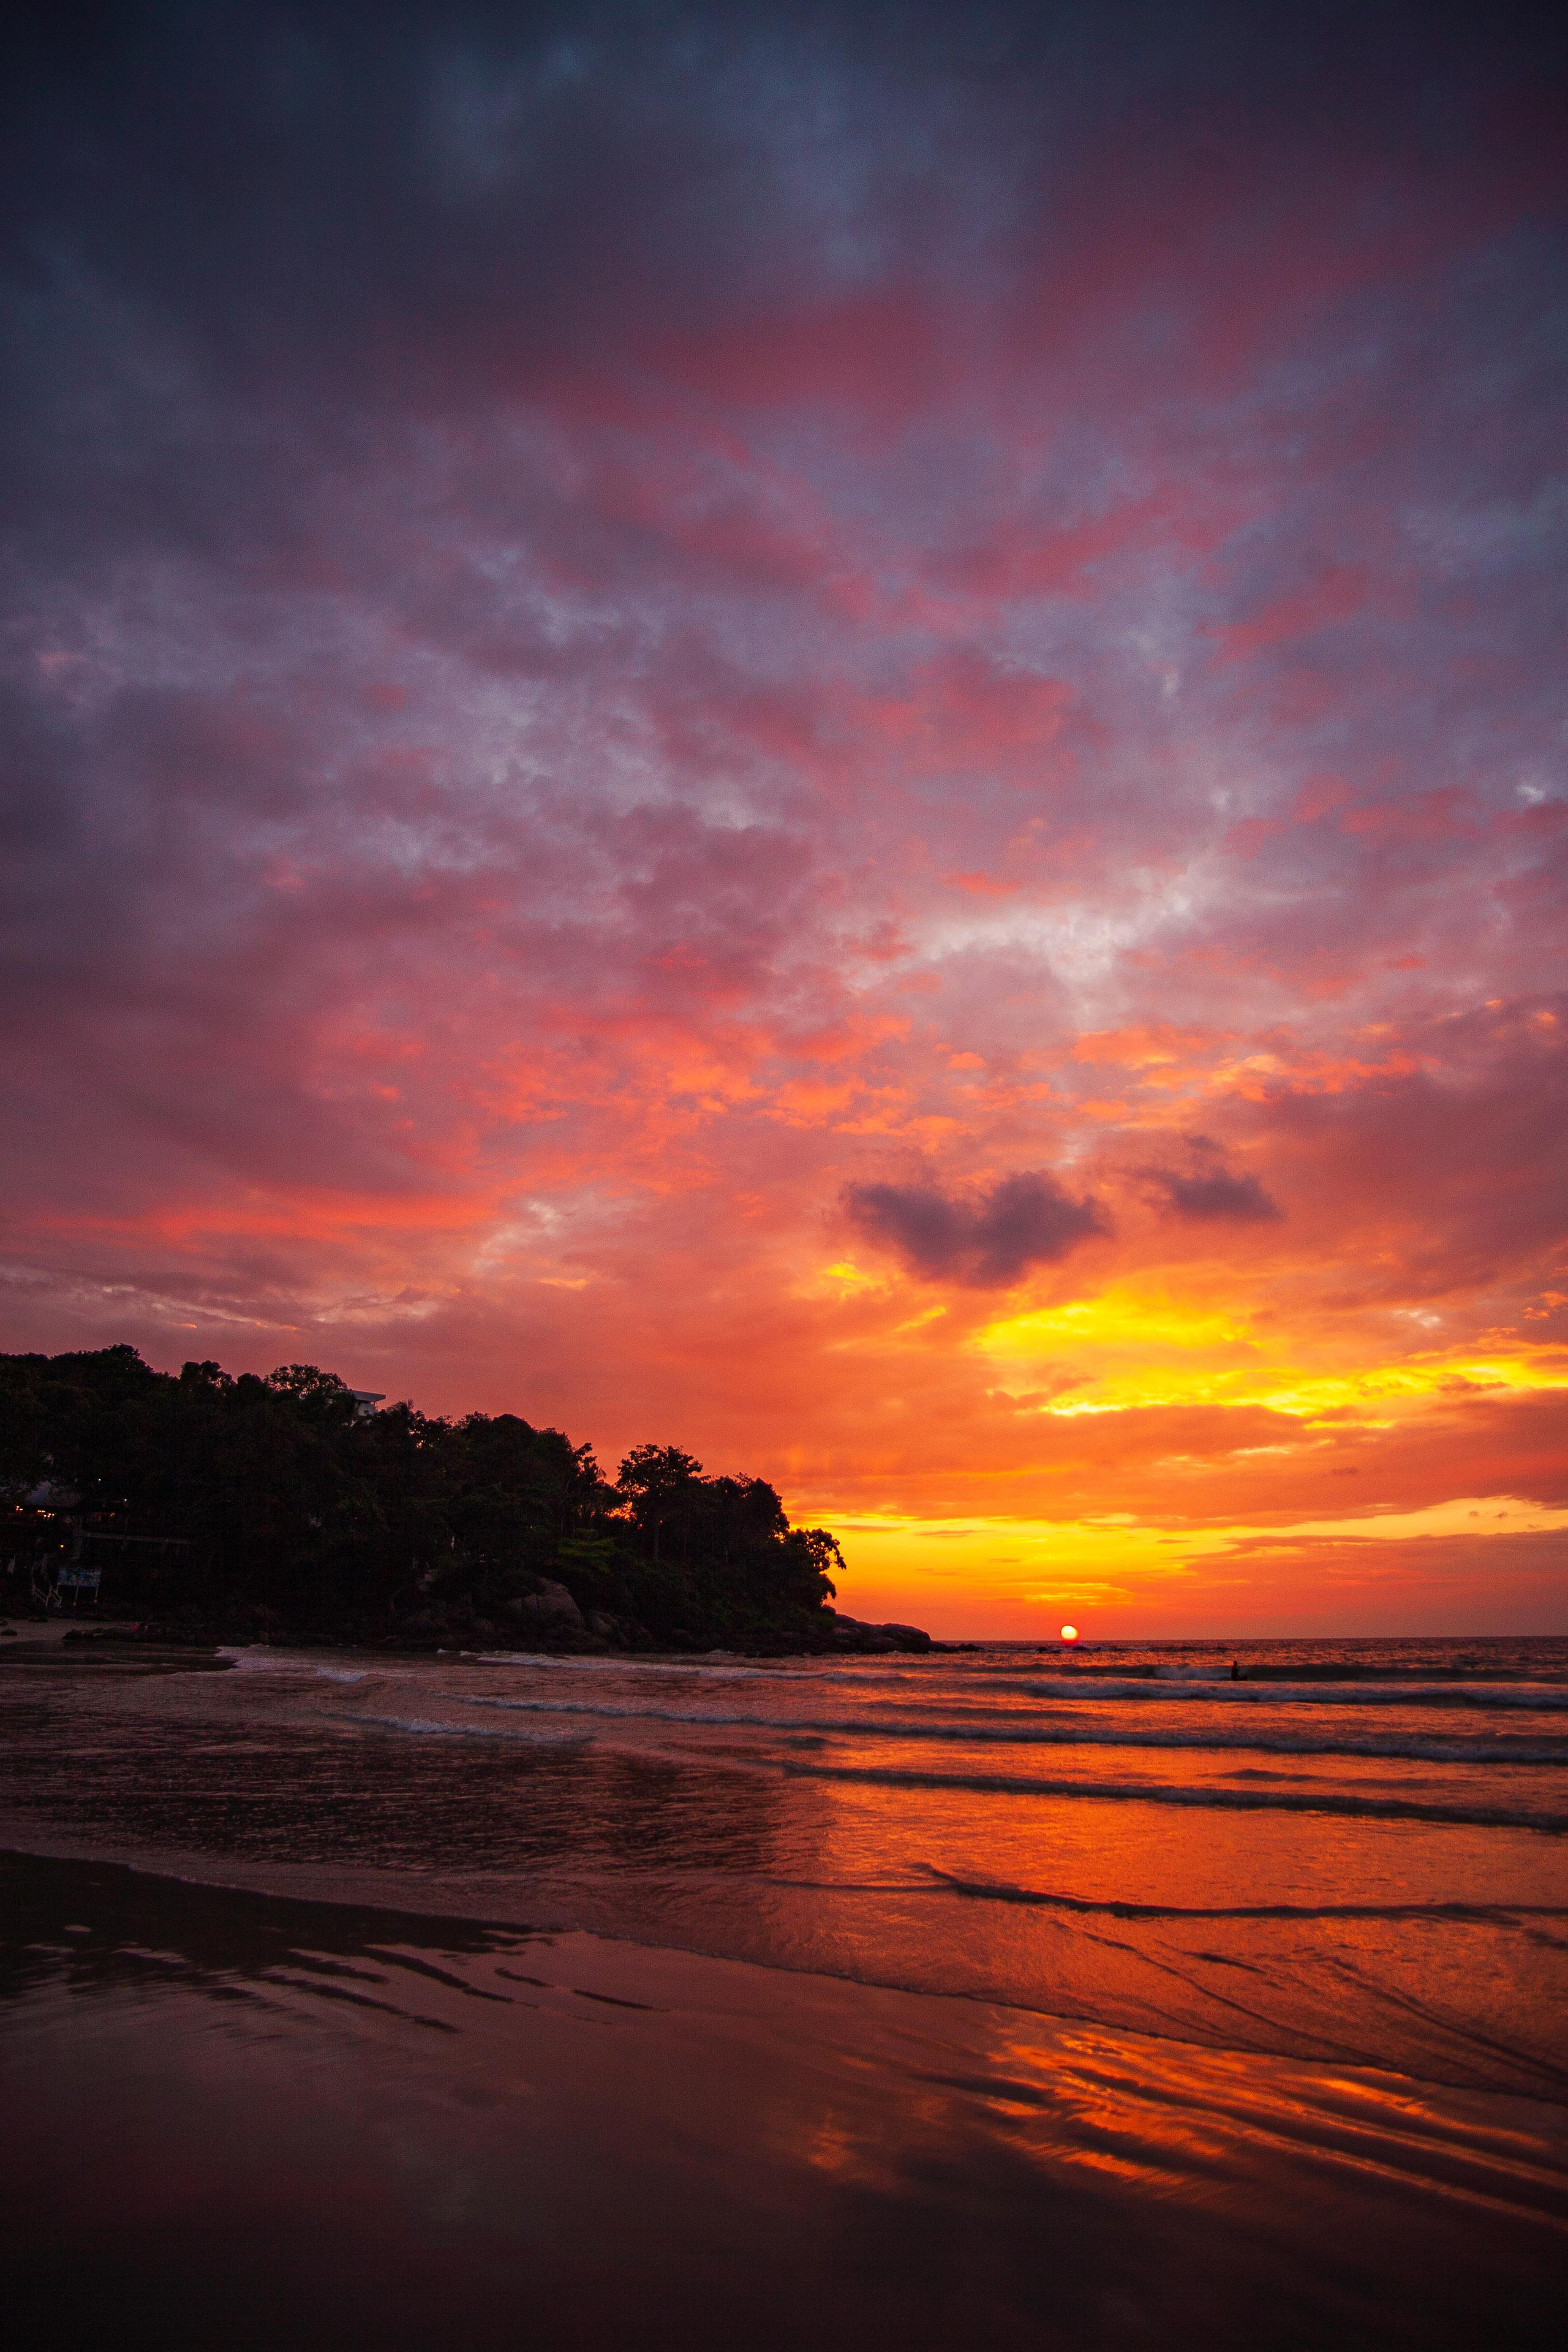

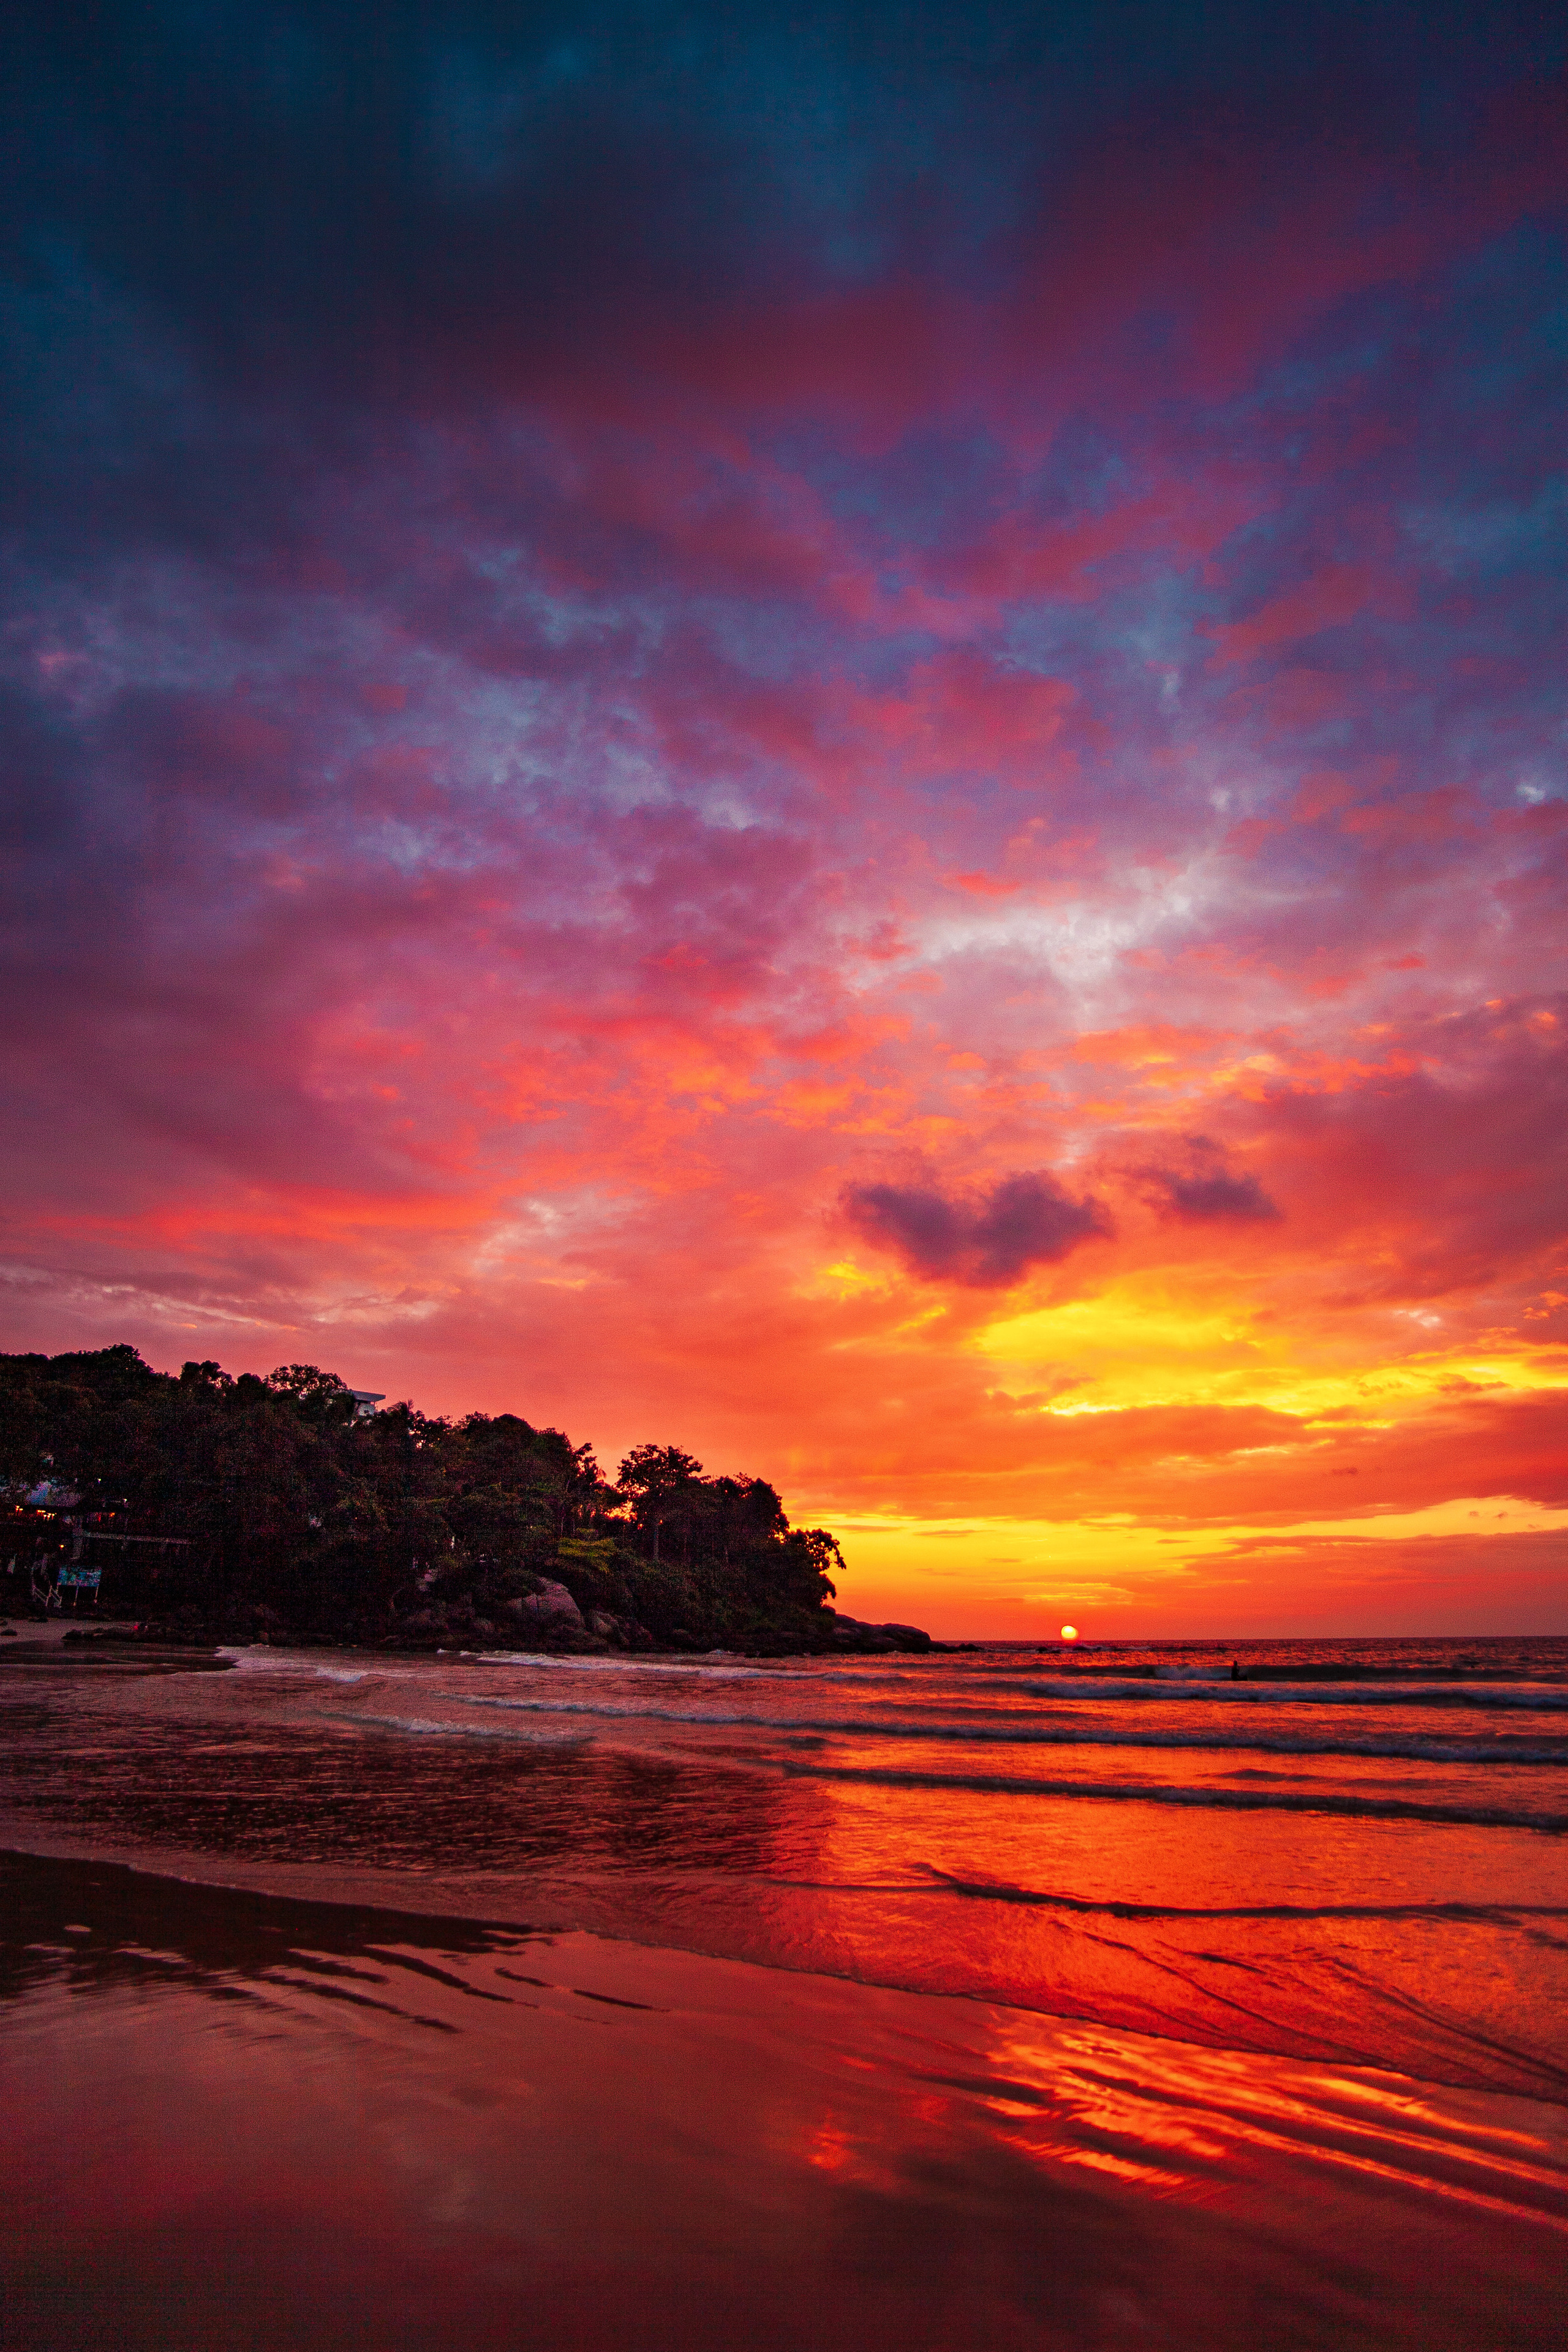
The Before and After results up to this point:
Since the last comparison we’ve used three Panel Groups
1. Split Toning
2. Optics Panel
3. Camera Calibration
The image becoming lighter in the corners is the result of a removed vignette, a neat trick the Optics Panel let us do!
What do you say about the colors?
This is why Camera Calibration is one of my favorite tools to play with!
Surprisingly it’s often neglected, even by advanced users of both Lightroom and Photoshop!
Don’t worry — We’re almost done!
The Tools Panel
Next, we’re going to get familiar with the Tools Panel, located on the
right side of our Camera Raw.
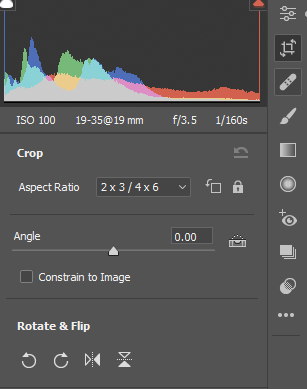
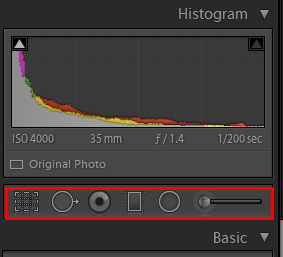
You’ll find the same tools in your Lightroom window located just below the histogram.
As you can see both are starting with the ‘’Crop’’ tool where you can
cut out or ‘’point’’ at the place of interest on your photo, cutting
away everything that takes away the attention from the subject of your shot.
Below, and in case of Lightroom — left of, the Crop tool you will find the Local Adjustment tools
1. Healing brush (used for Pimples, Blemishes etc,)
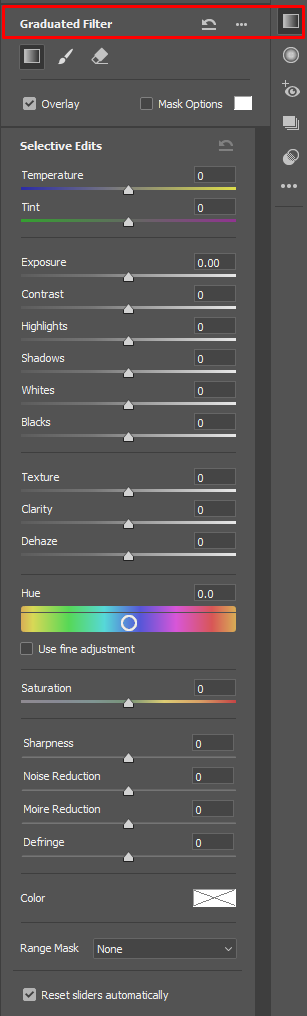
2. Brush
3. Graduated Filter
4. Radial Filter
They all operate on the same basis as the Global Adjustments we’ve
covered throughout our lesson.
As you can see the sliders are reminiscent of the Basic Sliders
group we’ve covered first.
The only difference between Global and Local adjustments is the fact that Local Adjustments allow you to select
and mark the area you wish to be affected by your settings,
…unlike Global Adjustments,
where the settings affect the photo in its entirety
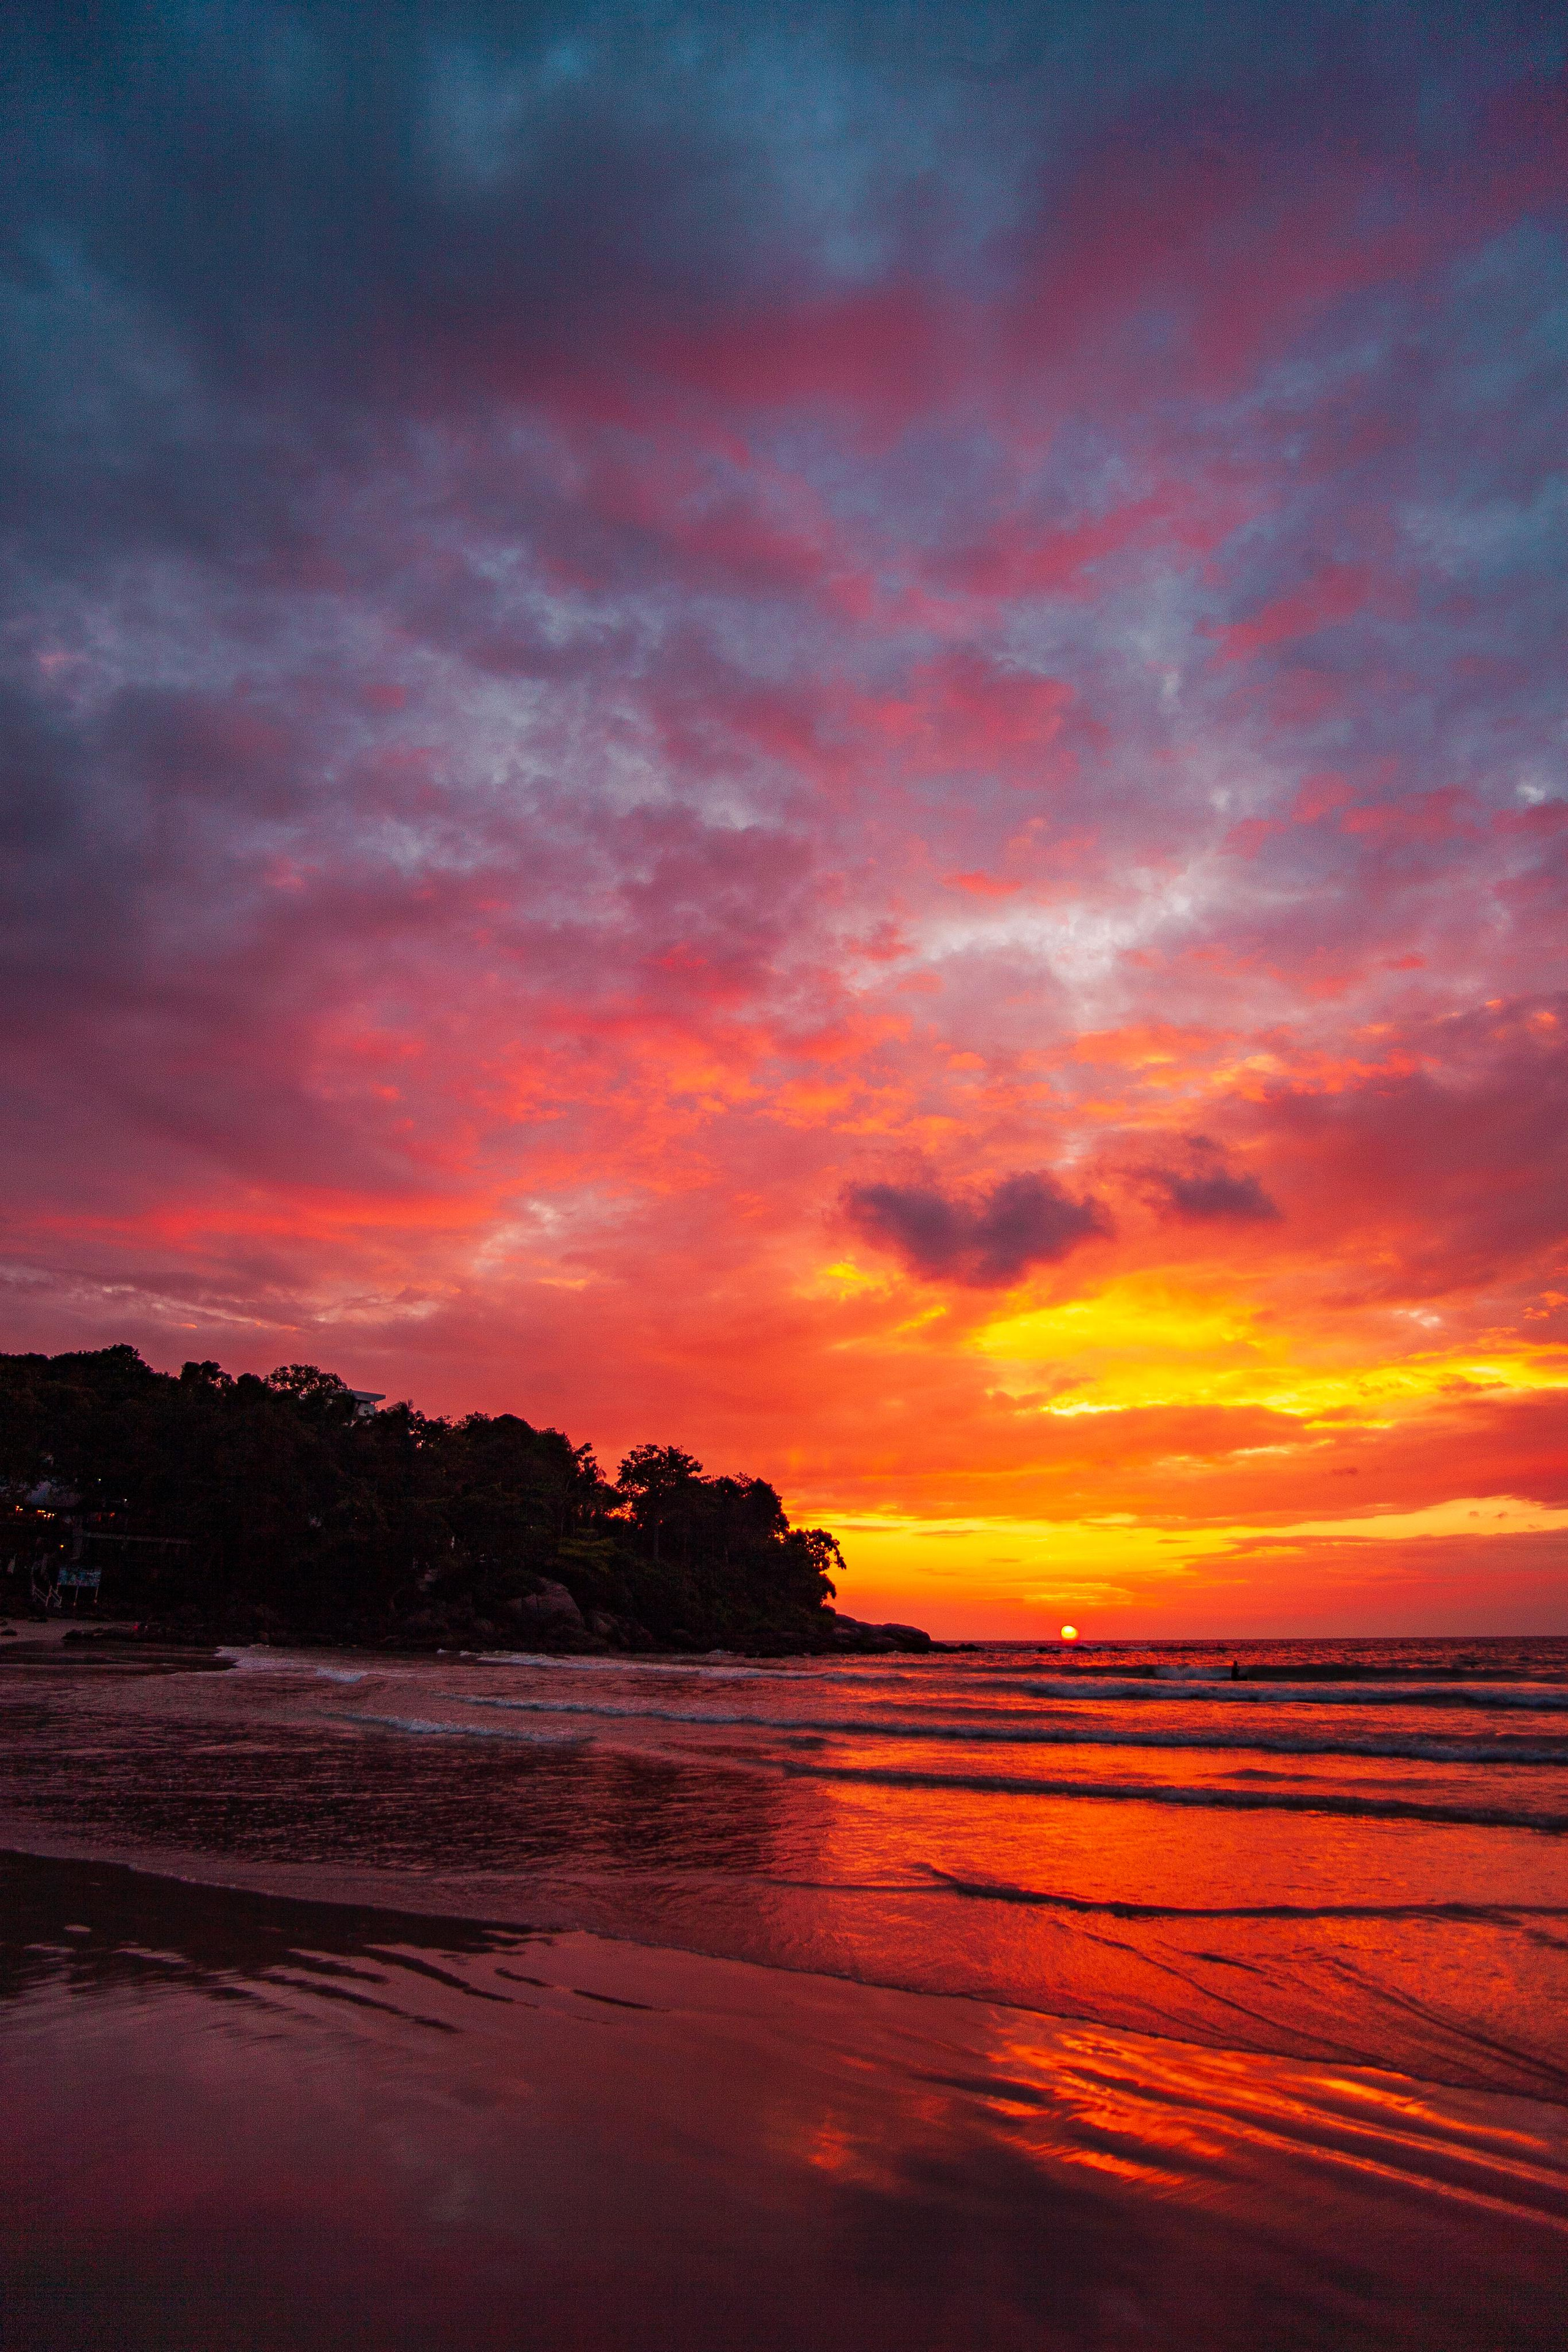
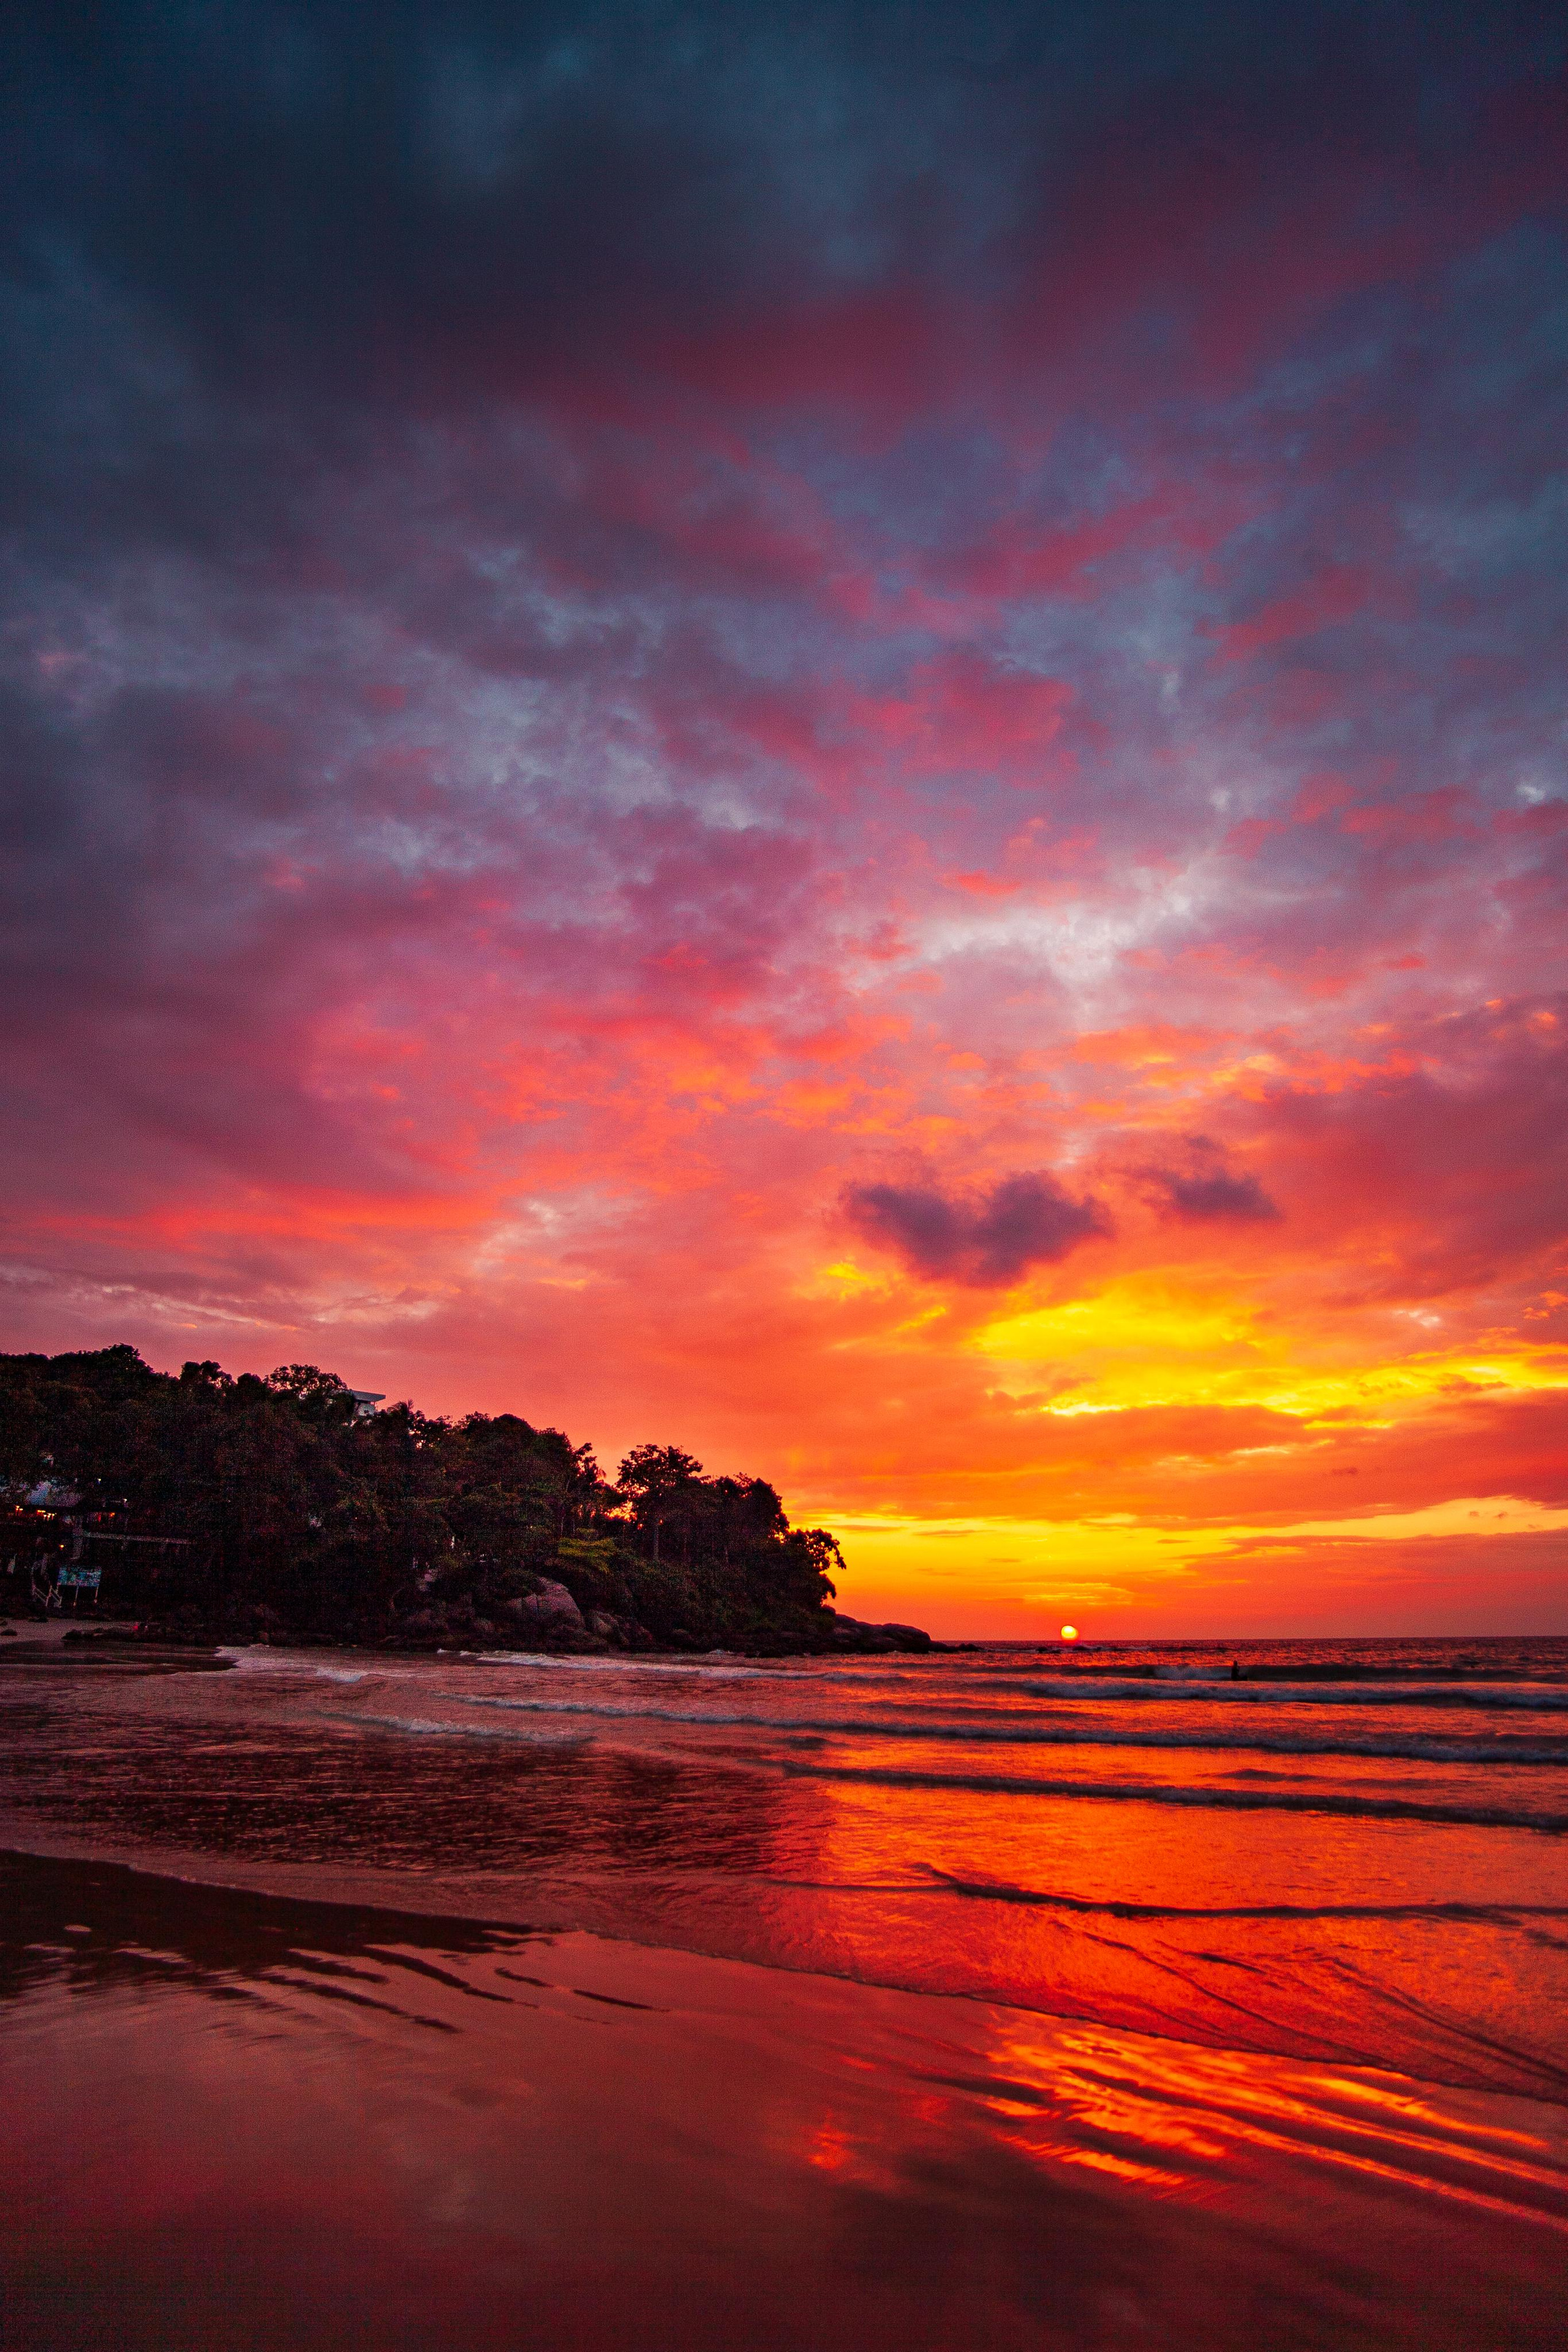
Here you can see how I’ve used the Brush tool to mark only the Forest on
our photo, pulling it out of the shadows, without affecting the
surrounding area.
Using the Graduated Filter I’ve darkened the sky a wee bit, focusing the viewer’s attention to the central part of the image
Using the Brush, I further enhanced the luminosity and the color of waves splashing the beach.
This way I am using only the contrast, light and color to point towards parts of the photo I consider interesting.
The
key strength of the local adjustments within Lightroom and Camera Raw
is that it allows you total control over the attention grabbing parts
of your image.
There are no set rules when it comes to the panel groups you
will be editing in first.
You can always return to the panel group you’ve
already finished with to change and revise your edit!
these are the results of what you’ve learned so far!
Still here?
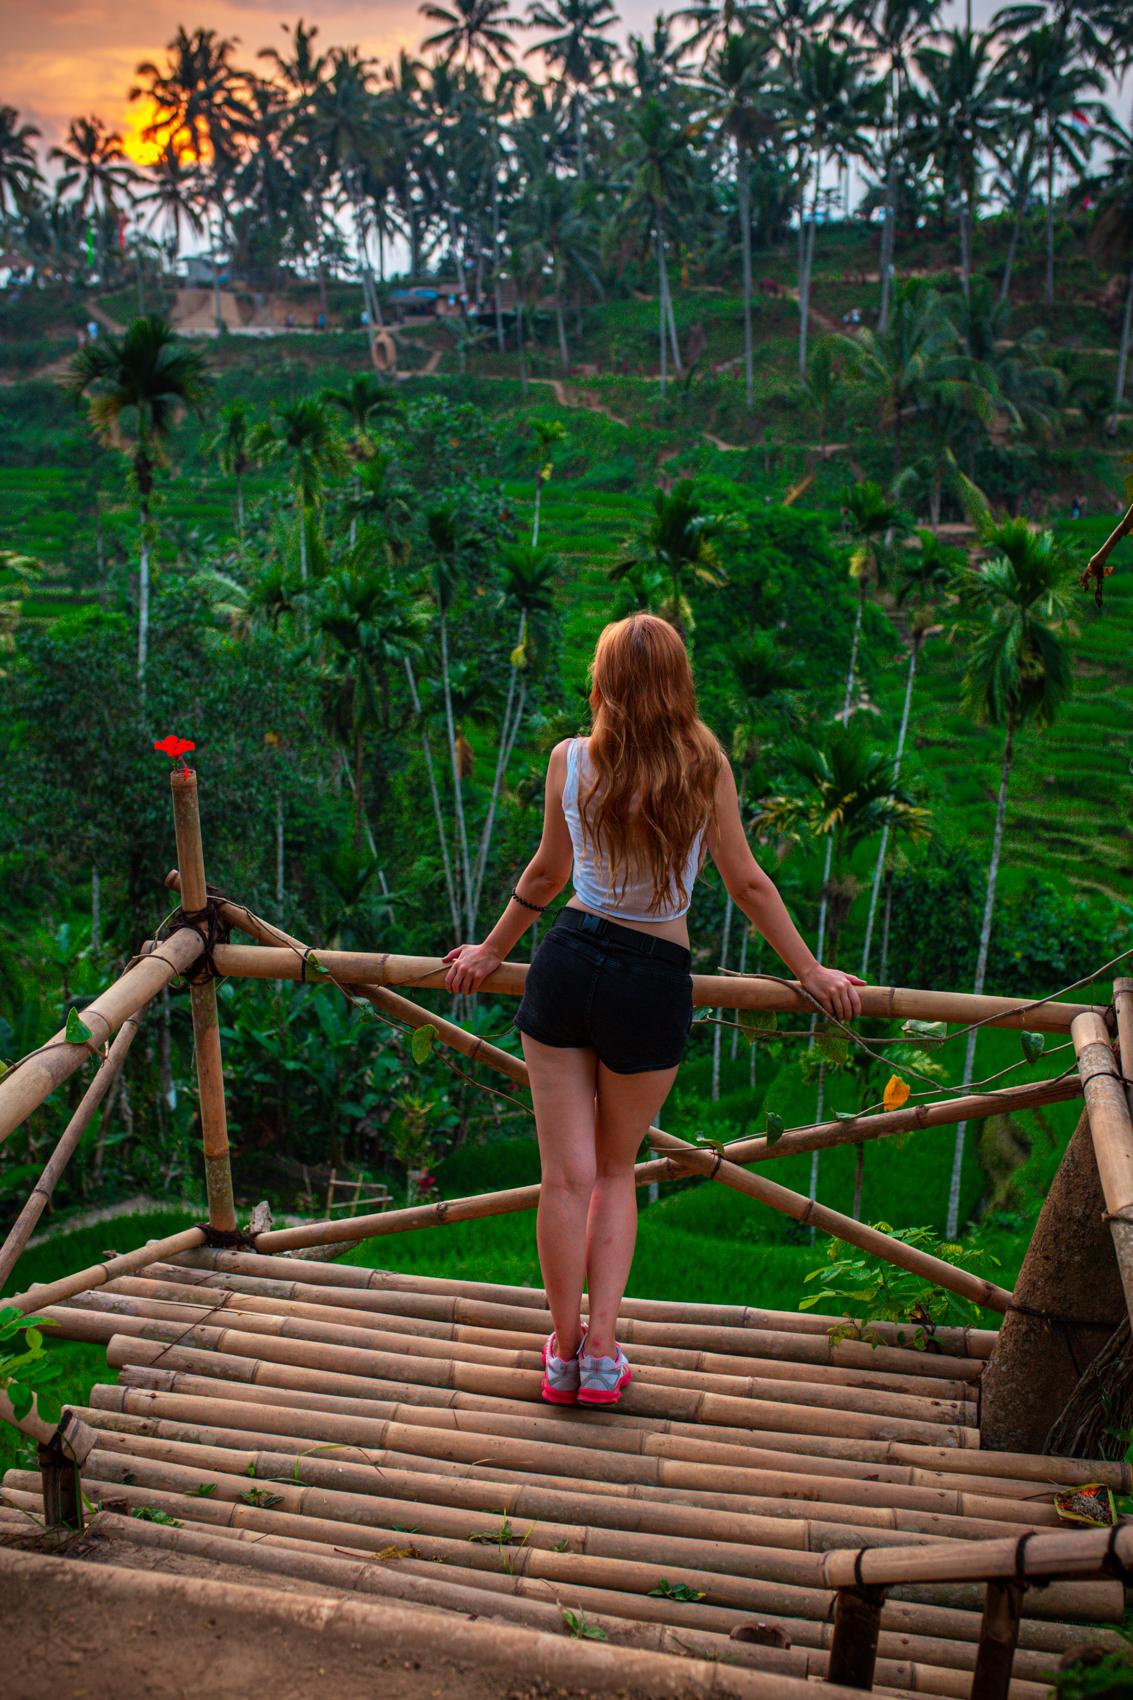
Now that we’ve covered the basics of the edit let’s give it a go using
another photo, this time a portrait shot.
Remember, all the rules we’ve
previously covered, apply here as well.
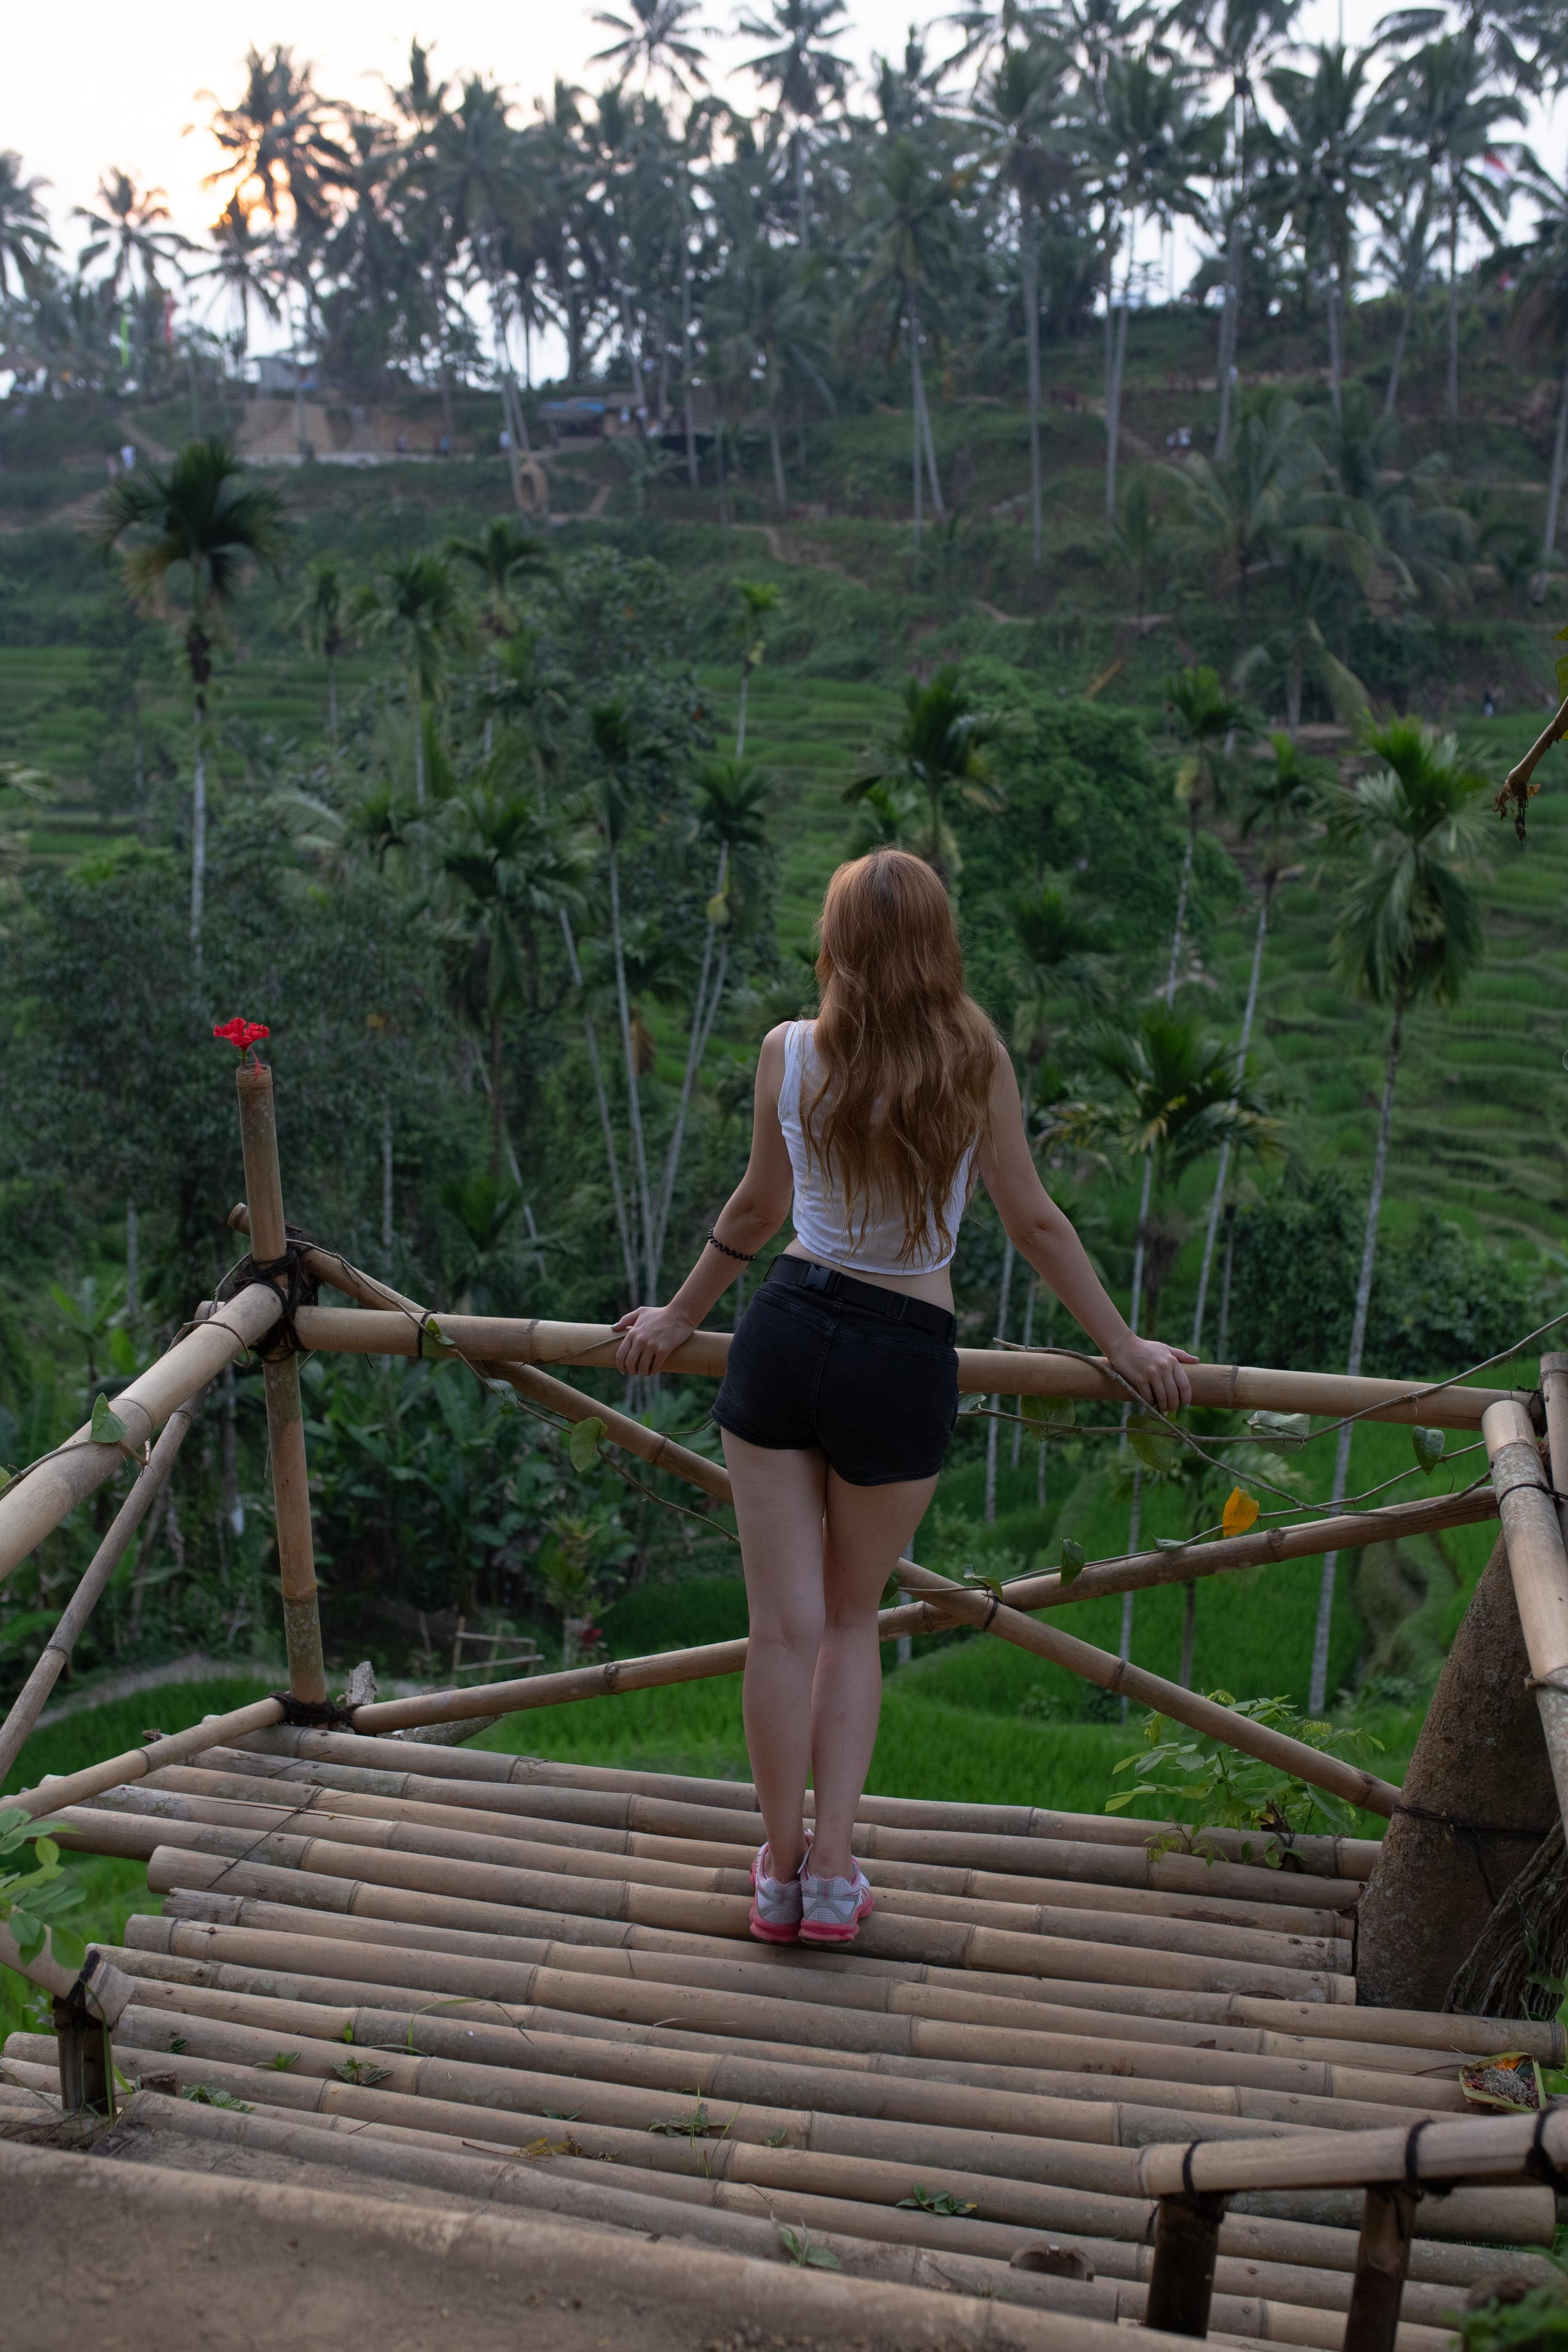
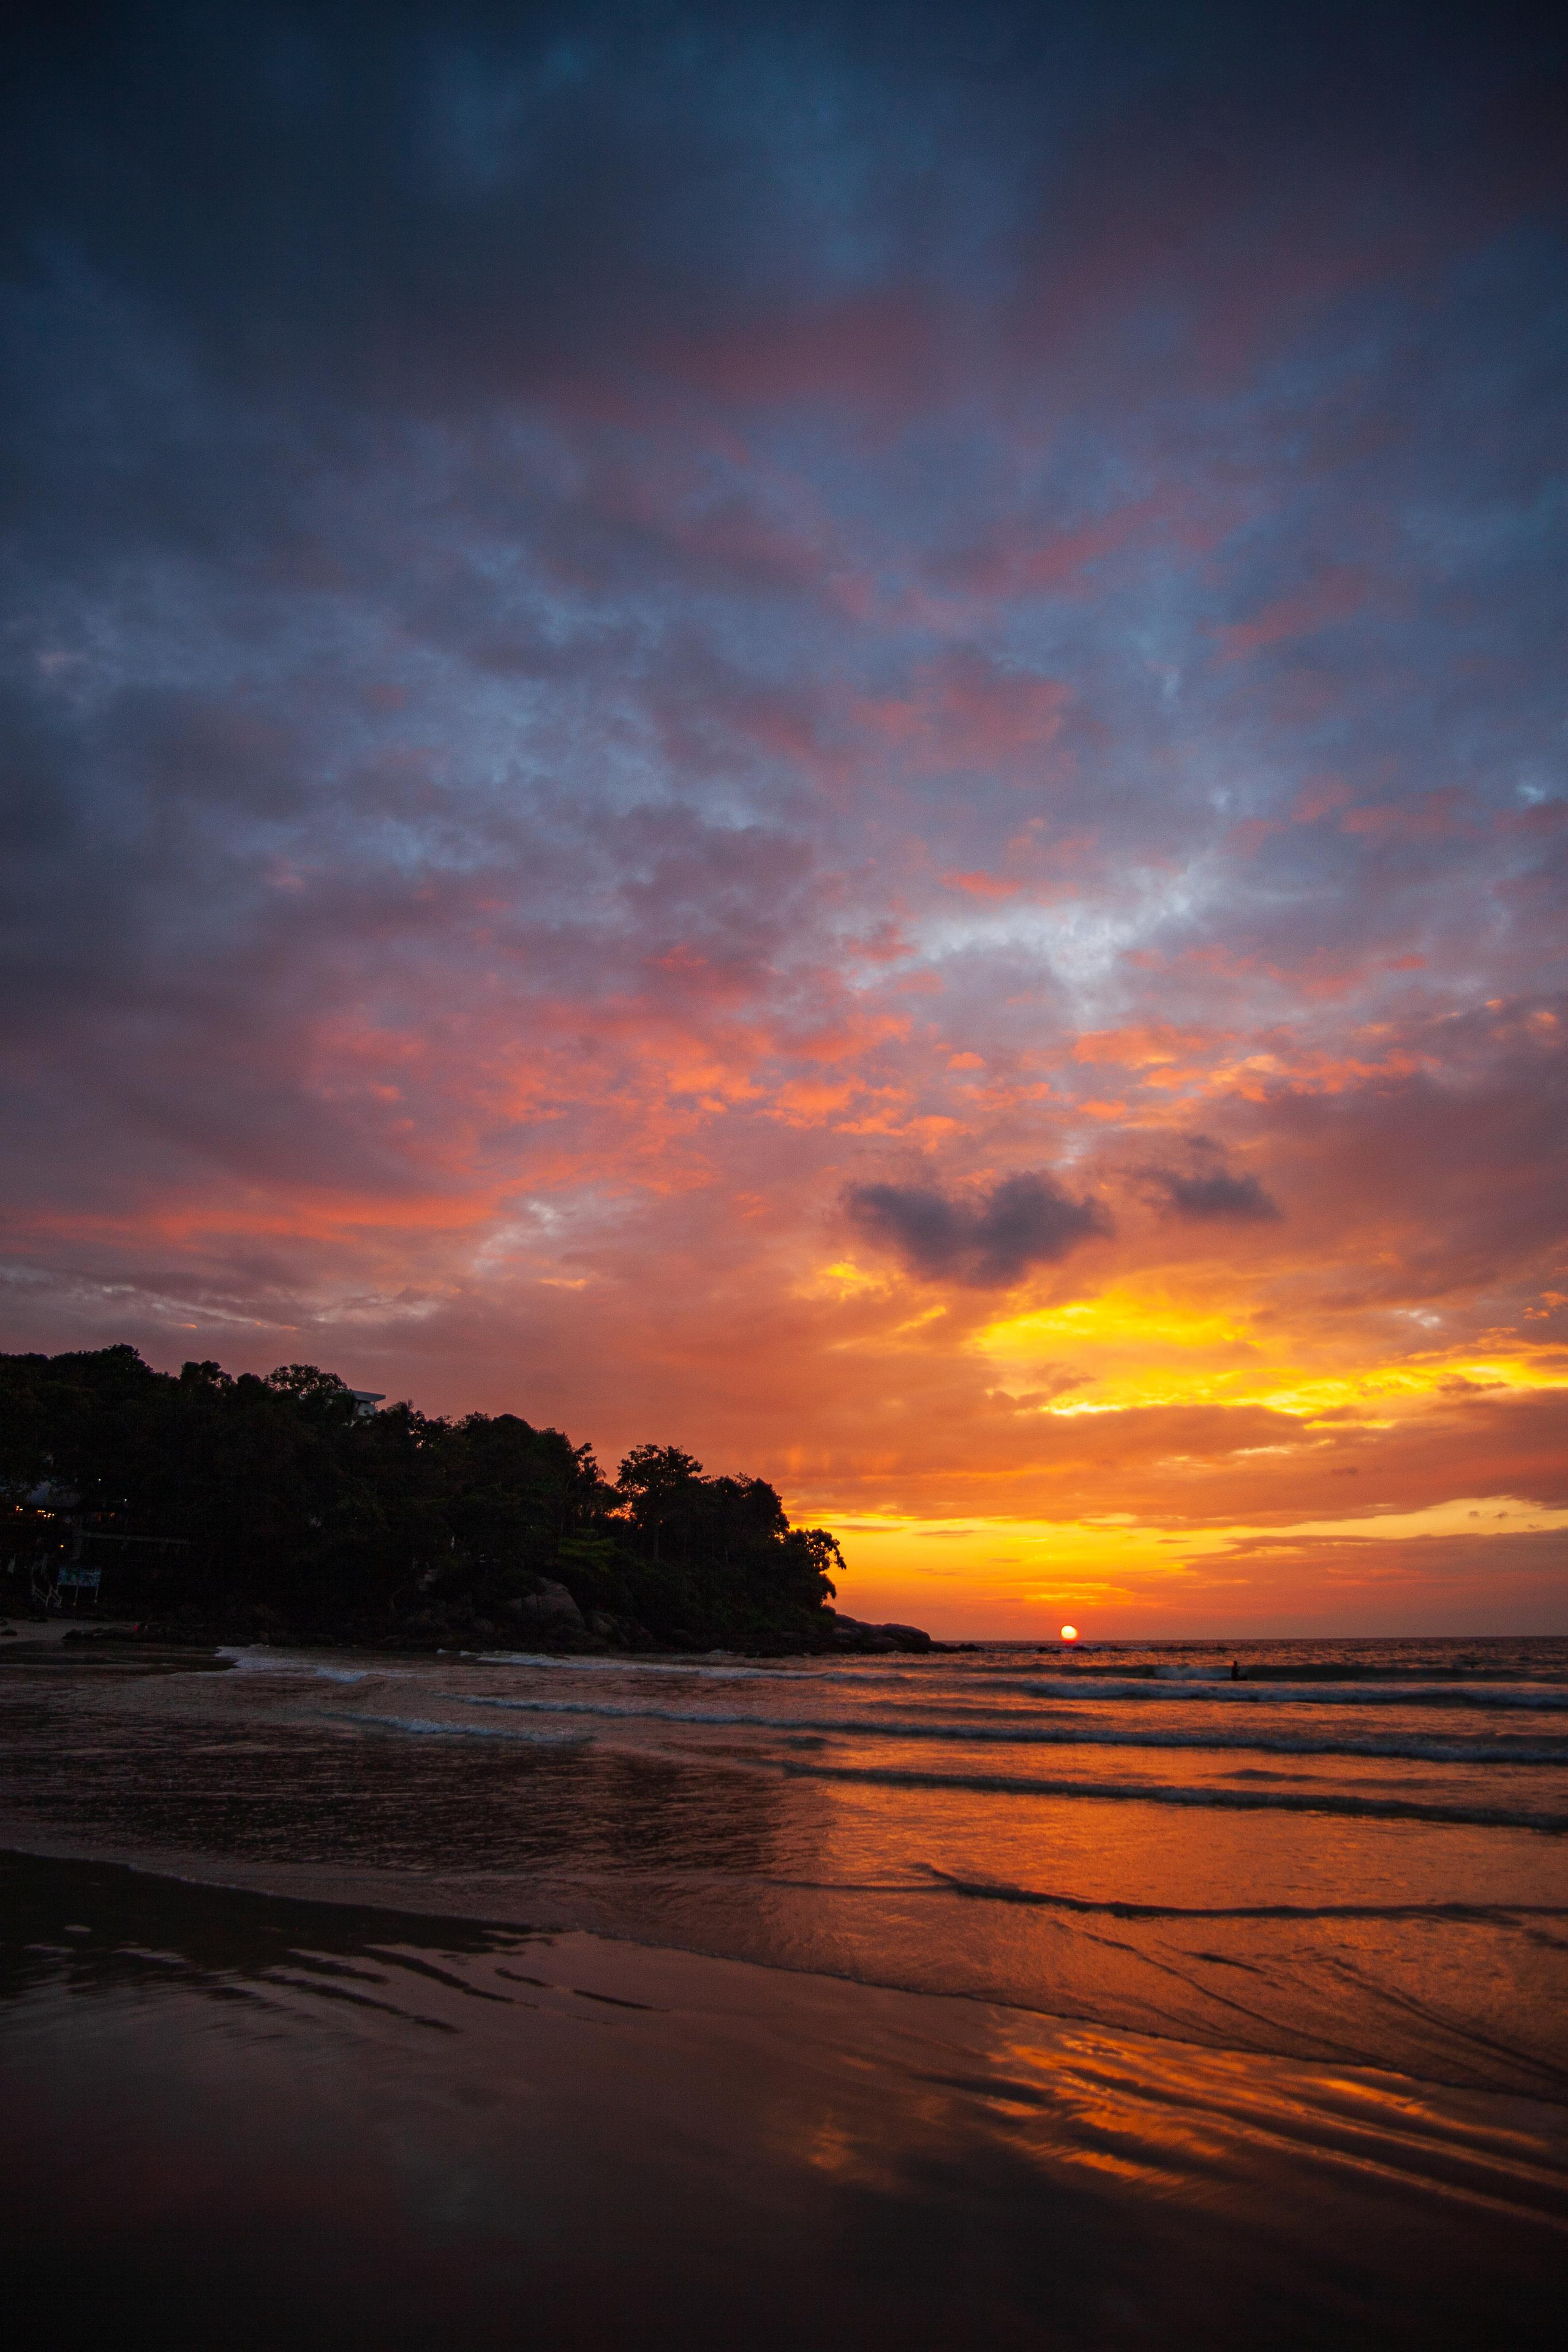
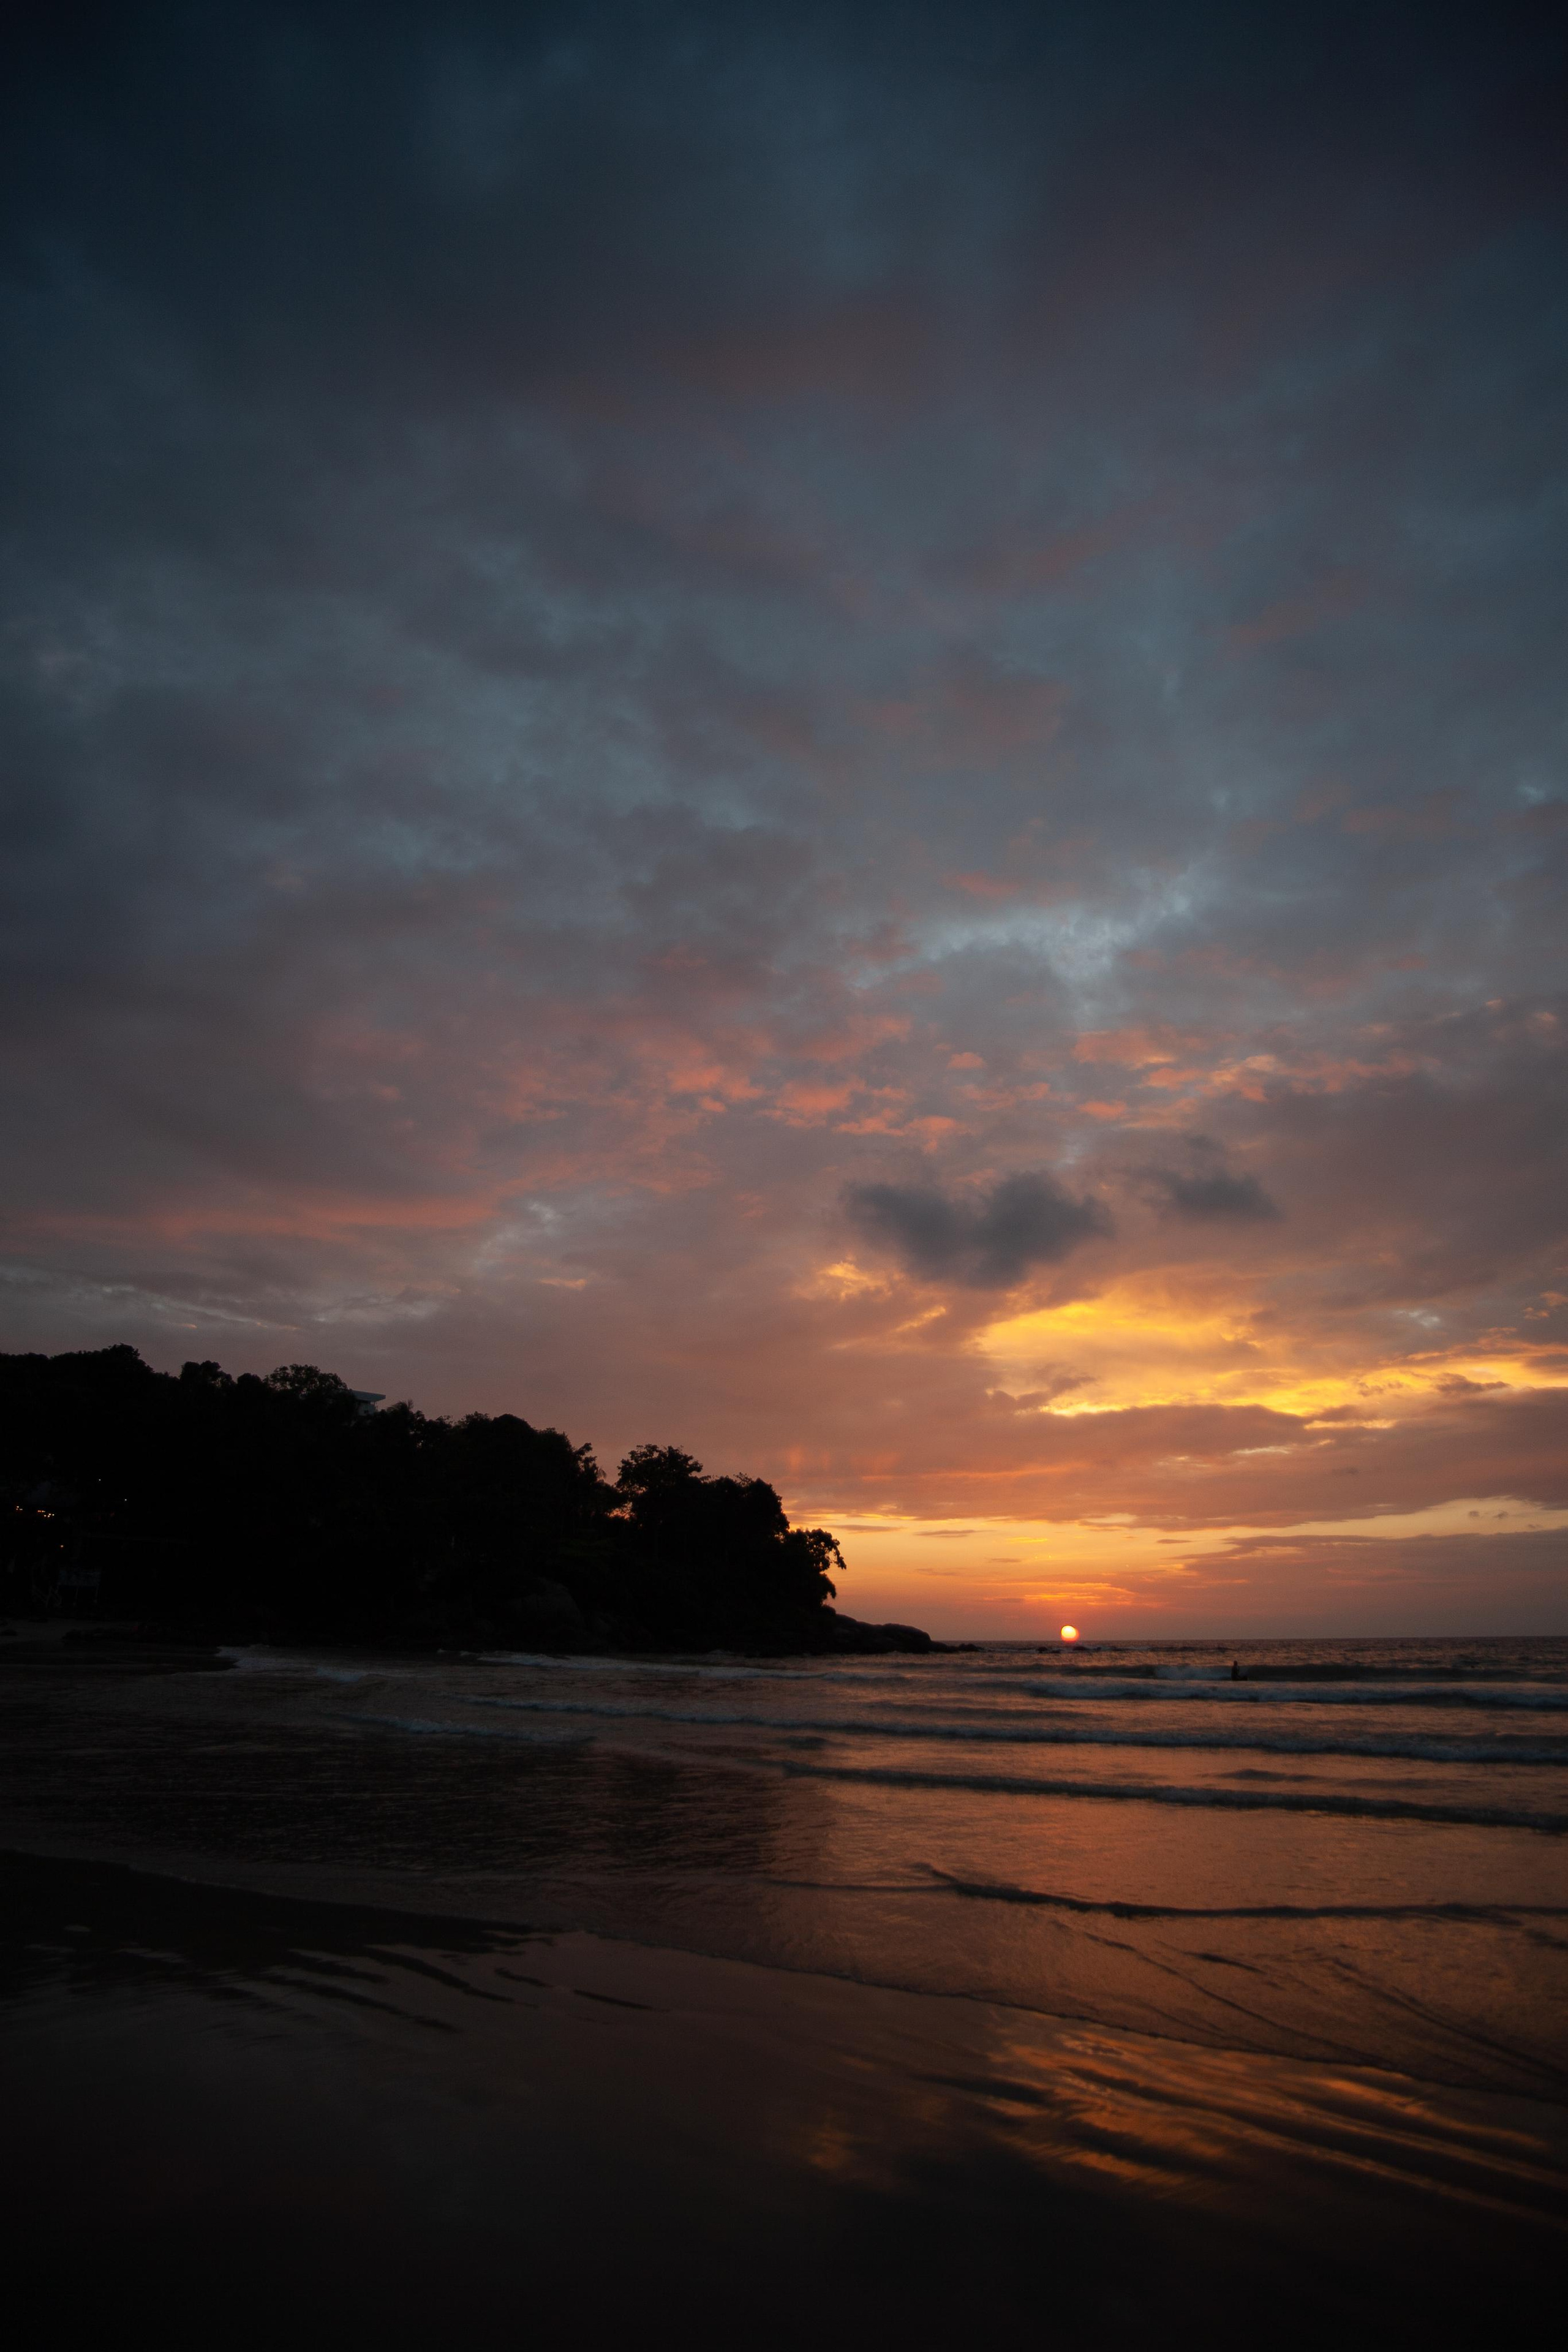
This is my starting shot, a photo of my girl, shot above the rice terraces in Bali.

The sun was setting down, however I’ve exposed for the shadows, giving advantage to her, being the subject of the photo
Luckily, this one, being a RAW photo, allowed me to recover the blown out highlights, revealing the sun setting down far behind.
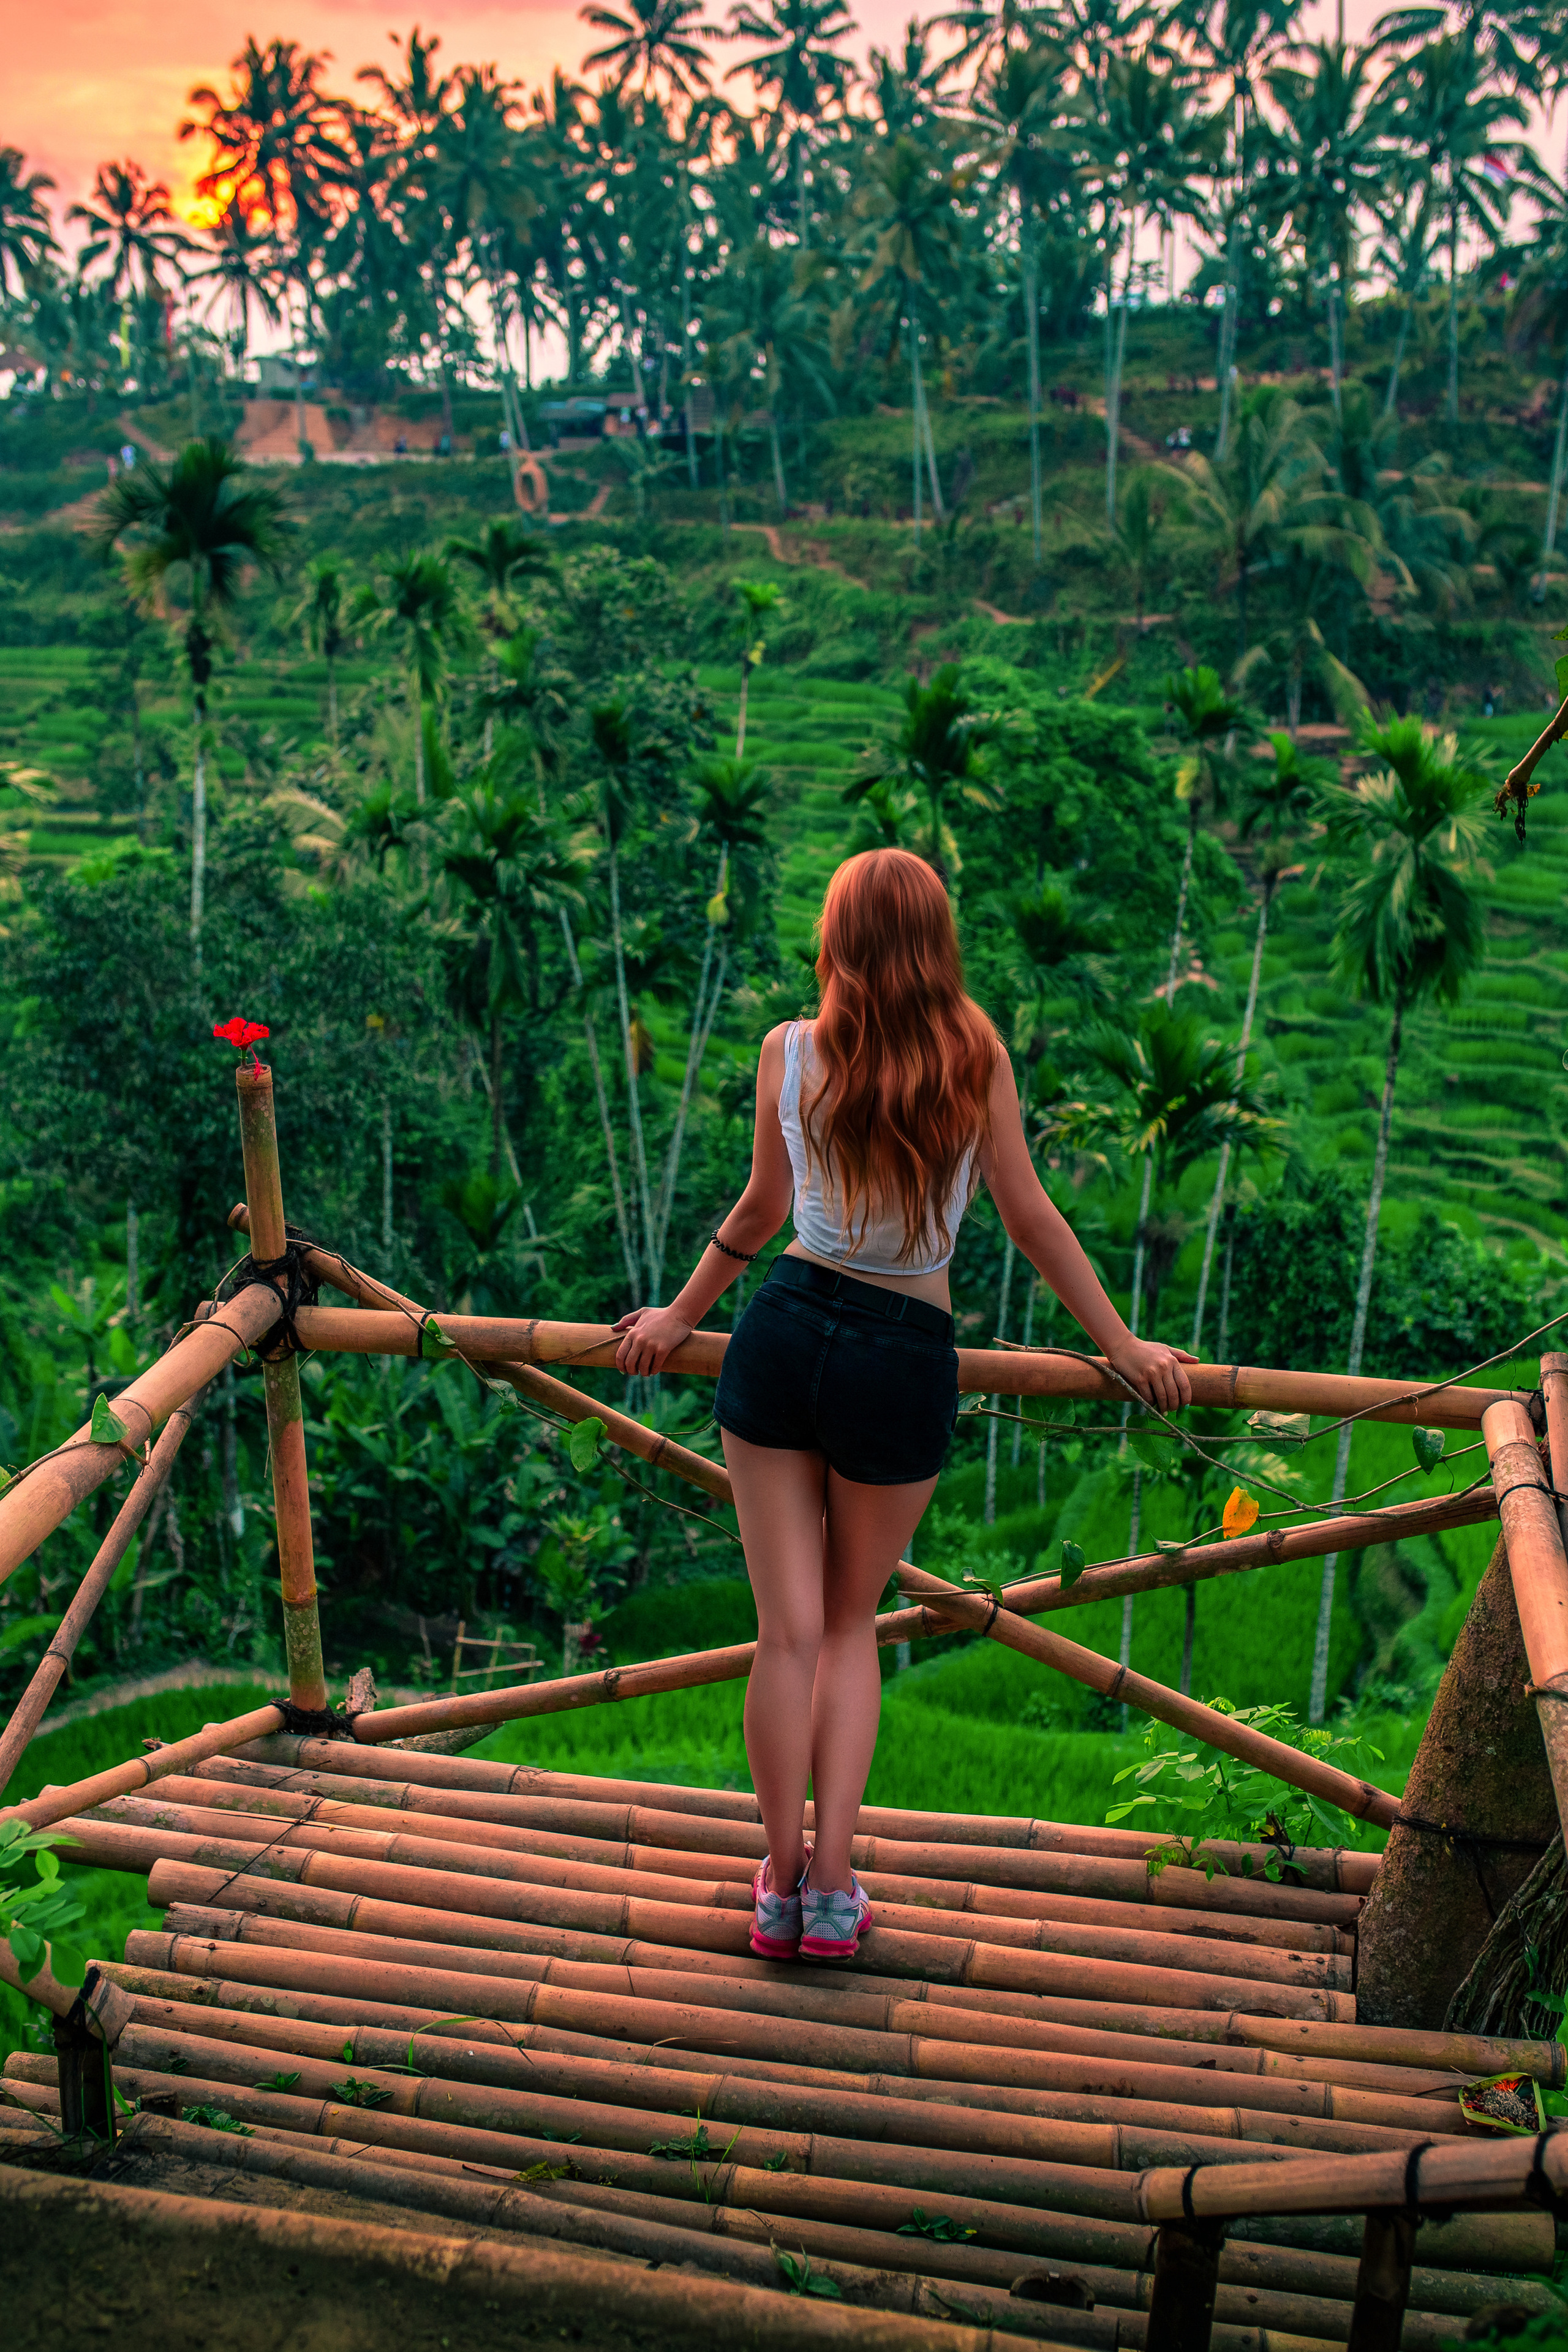
Going through all the Panels we’ve previously covered I’ve ended up with a photo that looks like this. Neat, colorful, and cute.
However, this image being a portrait, I thought of giving some further edit a try, moving my photo to Photoshop, doing the skin editing and some minor color manipulation.

I’ve retouched the hair, making it pop so much more, and using dodge and burn enhanced the legs. I’ve used another little trick I am teaching my students to make the figure flattering
a 5 minute edit, goes a long way!

With this being done, your photos are ready to be exported and shared with the world!
Hope you’ve learned something useful here today!
_________________________________________________________________________________
This tutorial is curated by our Expert Photographer Mark Smilyanic.
Published on September 9, 2020 by Rohit Tripathi
Behind the Shot ⚡
My interview for Zebra.rs
Behind the Lens with Mark Smiljanic

Interview for Boudoir Photographers United

A Deep Dive Into The Professional Model Photographer’s Journey & Inspiration
This was quite helpful not only for beginners but even for people who have been using Lightroom for a long time